Getting the Most out of Digital Calipers
If your job involves product or part geometry – most product development jobs do – I believe you should own and use a pair of digital calipers. They are one of the most important measurement tools to access the details of the geometry you’re working with. Even if your job is purely theoretical, it can be helpful to simply use the calipers to visualize the size and scale of features you’re specifying or being asked to work with.
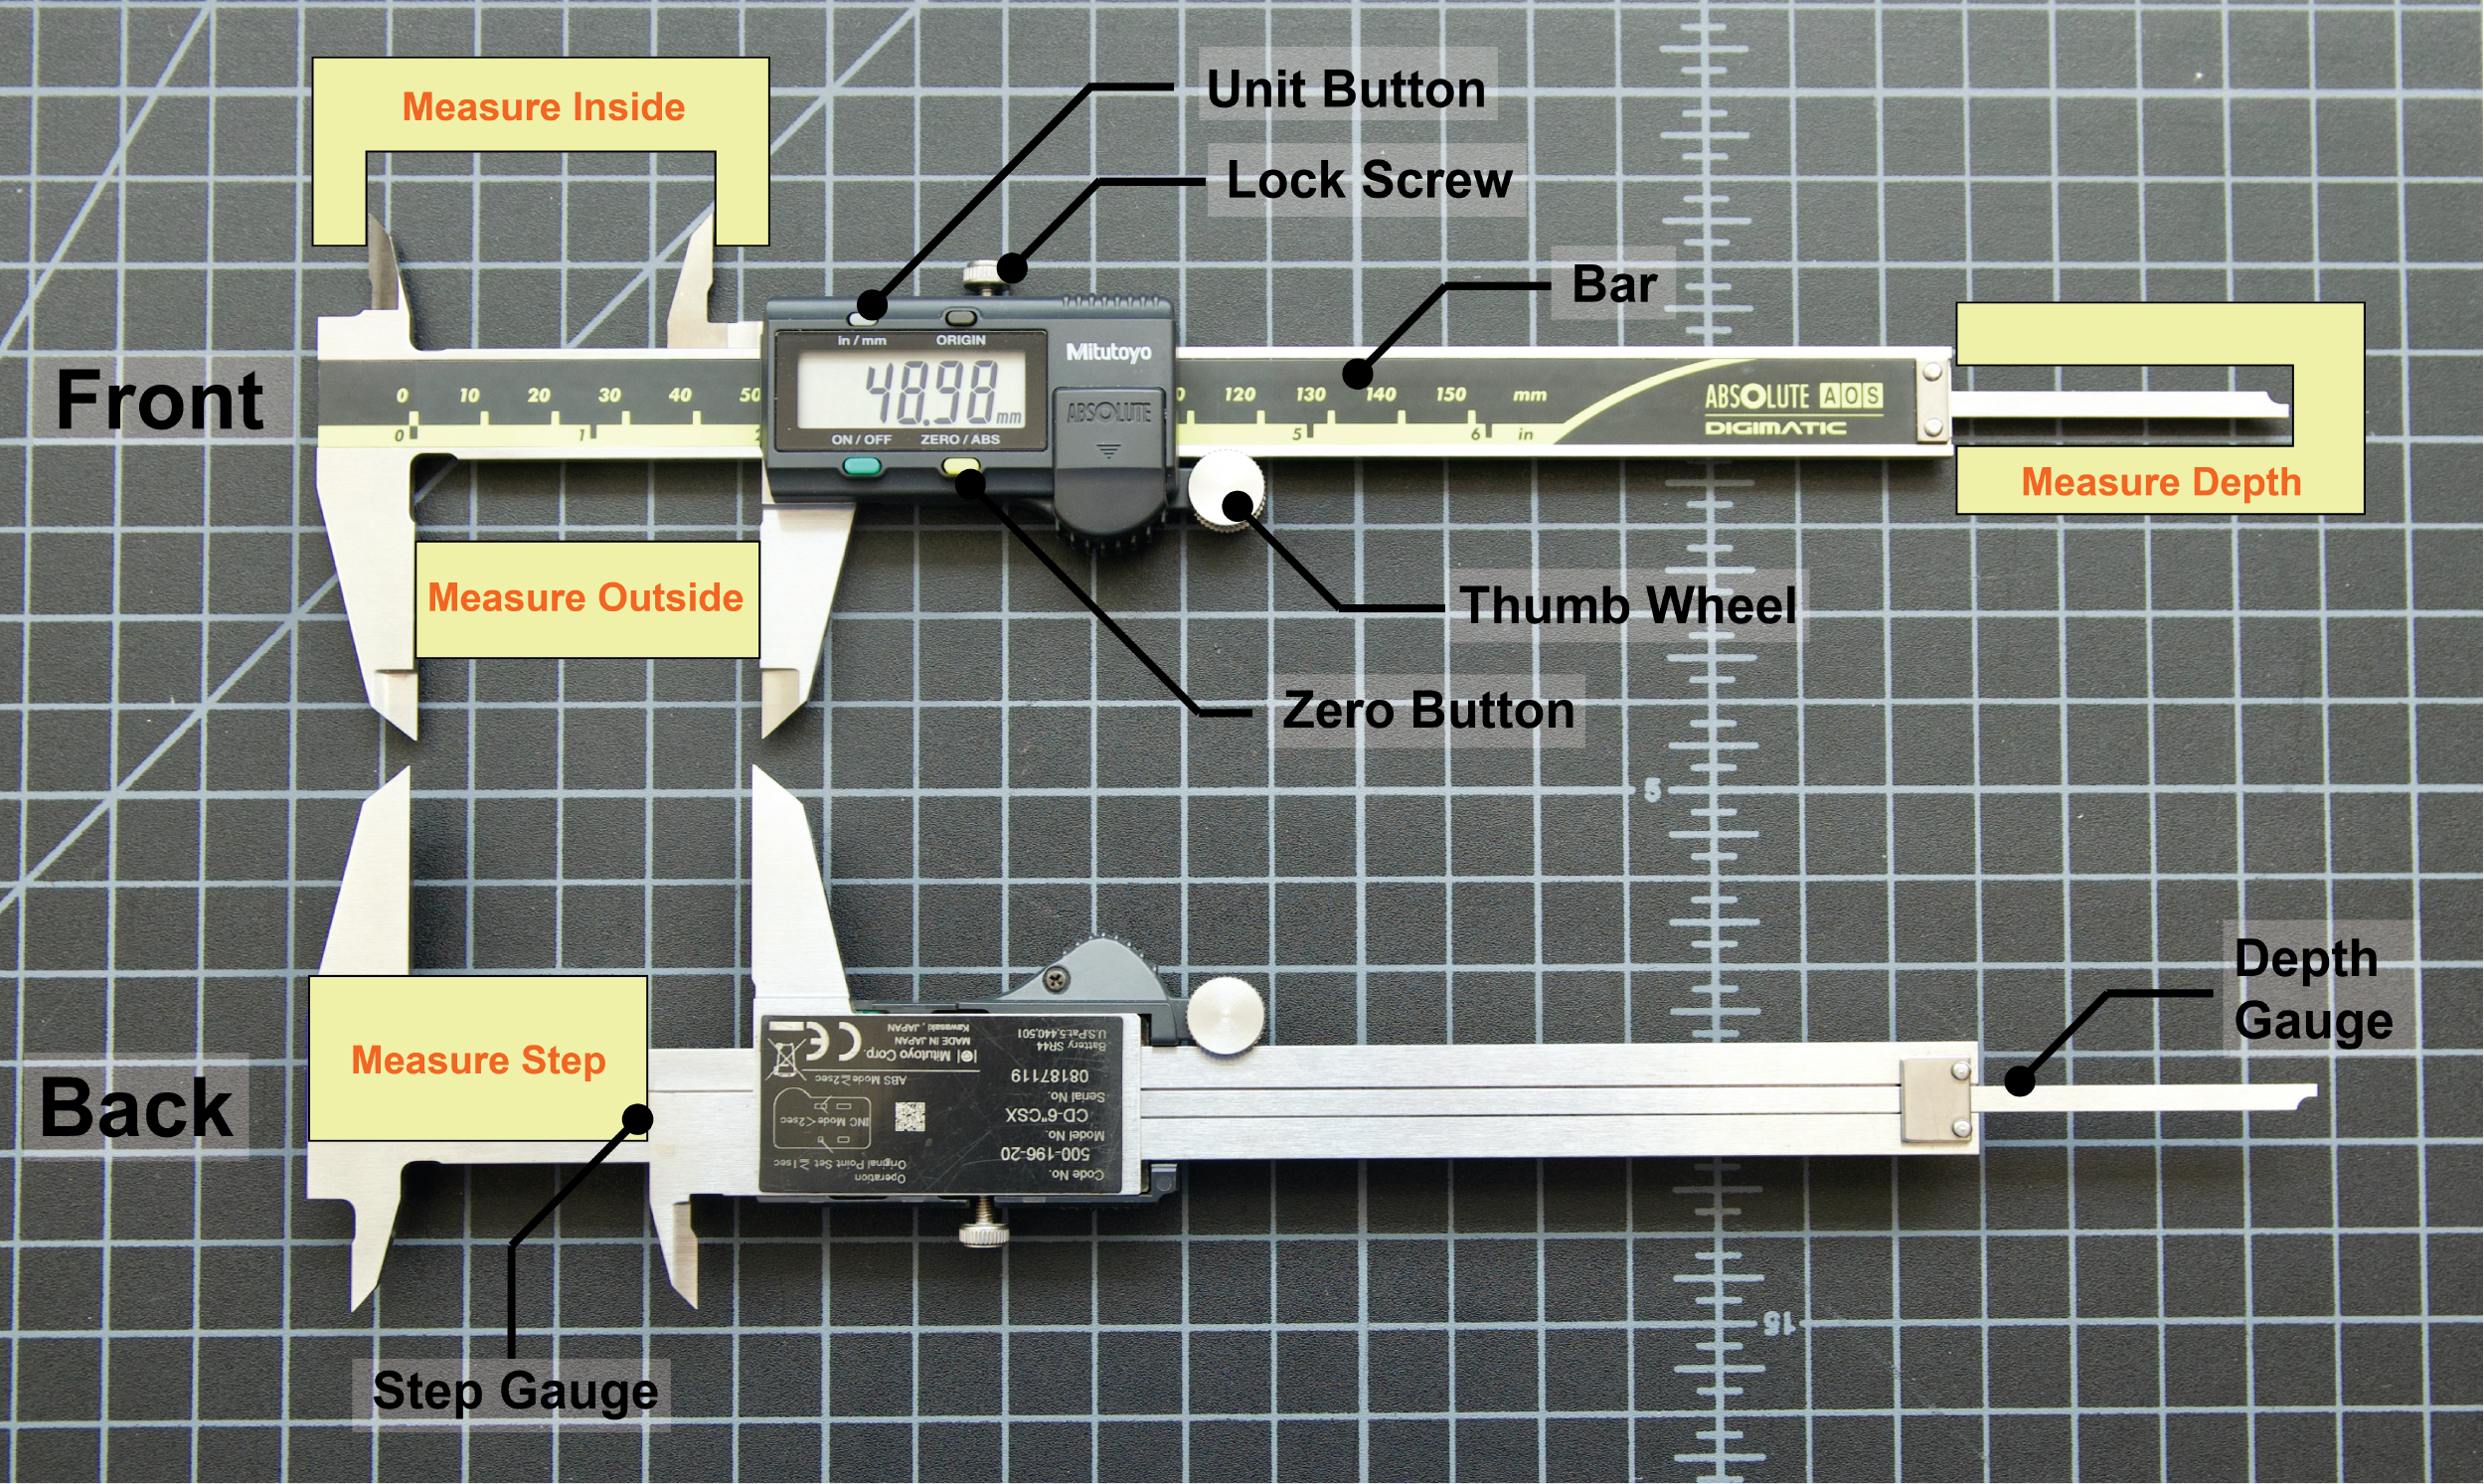
Functionality and Anatomy of Digital Calipers
The digital caliper is a precision instrument that will be most useful to you when it is well-cared for and clean. Store your calipers in the case to avoid having them get bent, dropped, or otherwise abused. Be especially careful of the measurement faces that need to remain flat, and measurement points that need to remain sharp in order to make accurate measurements. Measurement faces are the parts of the caliper that touch the object you’re measuring.
Before measuring, be sure to clean the measurement surfaces. My simple approach is illustrated below. The objective of the cleaning is to remove dust and oil that may be on the measurement surfaces. I find that there is almost always dust or oil that need to be removed.

Types of measurements
Digital calipers can be used to make a variety of useful measurements. The following are described below with illustrations and some text that provides additional insight:
Outside measurements
Inside measurements
Center-to-center measurements
Step measurements
Depth measurements
Deviation measurements
Corner/edge radius estimations
Outside measurements
For outside measurements, hold the caliper as shown. Move the measurement jaws with the thumb wheel. Whenever possible, make the measurement close to the bar to reduce any flex in the jaw.


How much pressure you should apply to the part when measuring? Generally only light pressure is needed. To get a good feel for the right kind of pressure, measure the diameter of a pencil or pen. Apply just enough pressure to hold the pencil/pen steady in the caliper jaws without any other supports (like your other hand, or a work surface). It should not fall out of the jaws under its own weight. This is the right kind of pressure. Be aware that additional pressure can deform the part and produce an erroneous measurement.
Inside measurements
Inside measurements use the small prongs at the top of the caliper as the measurement surfaces. When measuring the diameter of a hole, make multiple measurements of the diameter, looking for the largest measurement taken. When measuring the width of a rectangular slot, make multiple measurements, looking for the smallest measurement taken. This is because the prongs on the inside measurement gauge don’t have a large flat measurement surface, thus it can be easy to make measurements between two points that are not actually the two points you’re interested in.

Center-to-center measurements
A common measurement of interest is a center-to-center distance between holes. When these holes have the same diameter, an indirect measurement can be made. First, measure the diameter of one of the holes, then without adjusting the jaws, zero the calipers. Then measure outside edge to outside edge of the hole. The number shown on the readout is the center-to-center distance between the holes. Because two measurements were made (the diameter, and the outside-to-outside distance), the measurement error associated with this can be twice as large as if there was only one measurement made.

When holes are not the same diameter, center-to-center distances can be measured making three measurements (diameter of larger hole, diameter of smaller hole, distance to outside edges) and calculating the distance. This results in a measurement error that can be three times as large as a single measurement.
Step measurements
Whenever possible, it is best to make a direct measure of a feature, as opposed to making two or more measurements and then calculating. It is best because it reduces overall measurement error. The step gauge is valuable for making direct measures of steps. The step gauge is on the back of the caliper as shown below.
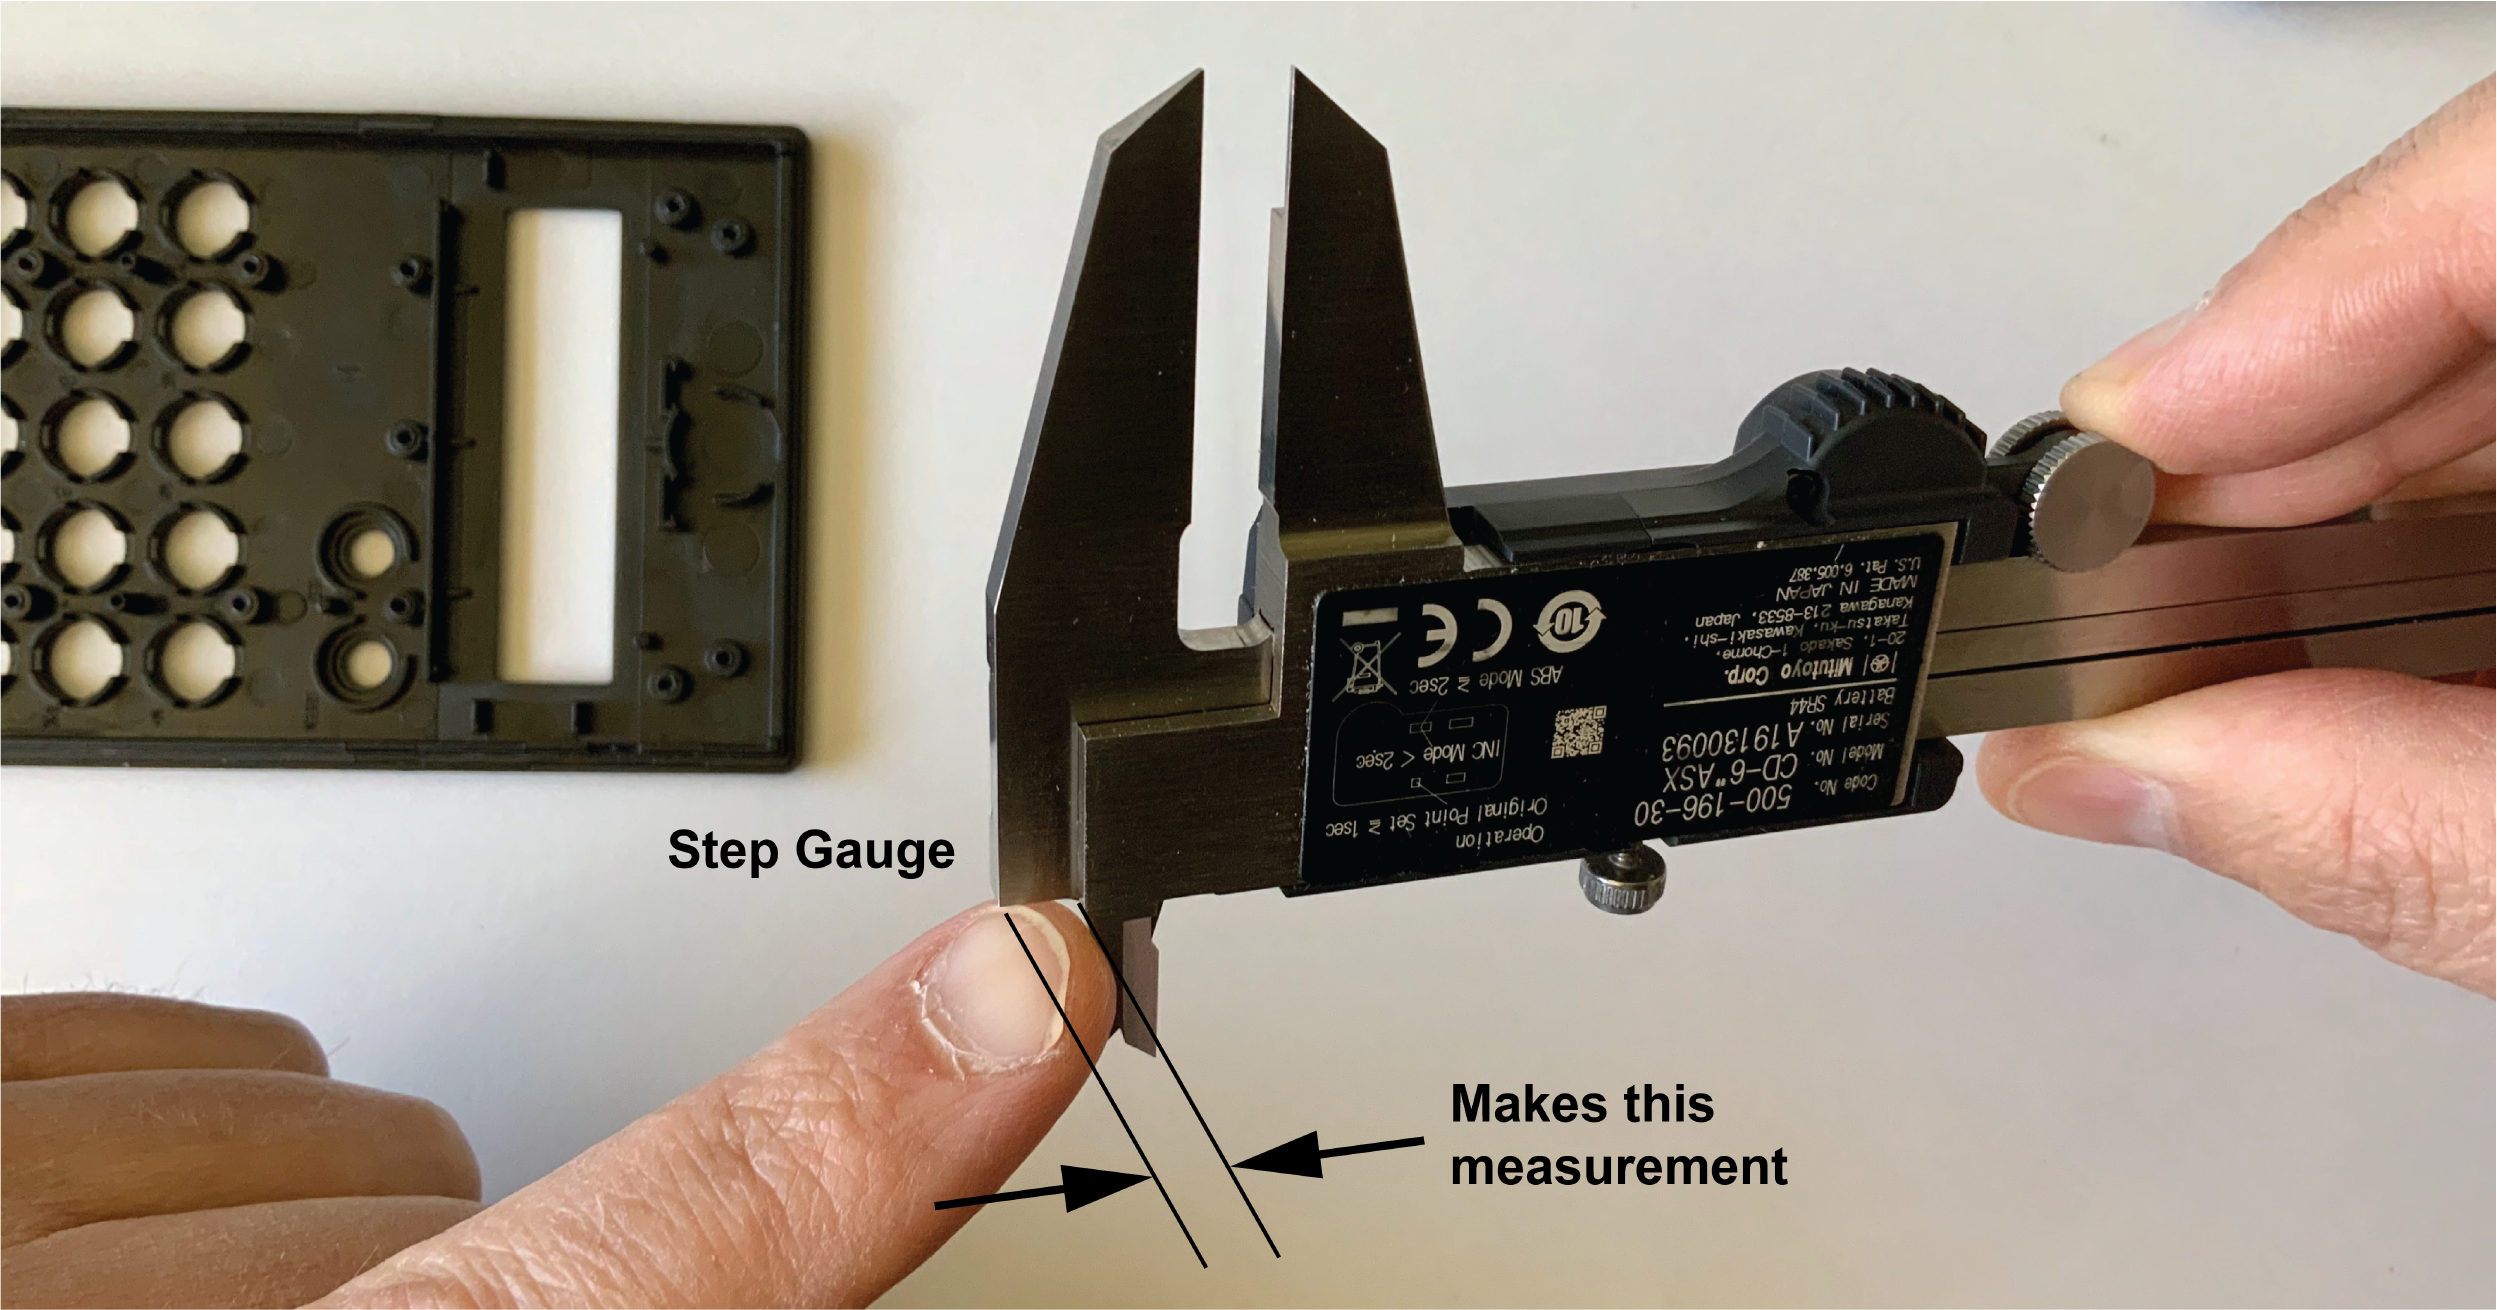
To make a step measurement, stabilize the measurement surface of the fixed jaw on the part, then carefully move the other jaw to the upper part of the step as shown. Because the readout is not visible while looking at the measurement surfaces of the step gauge, it can sometimes be helpful to tighten the lock screw thus locking the measurement in place, then turn the caliper so the readout can be seen.

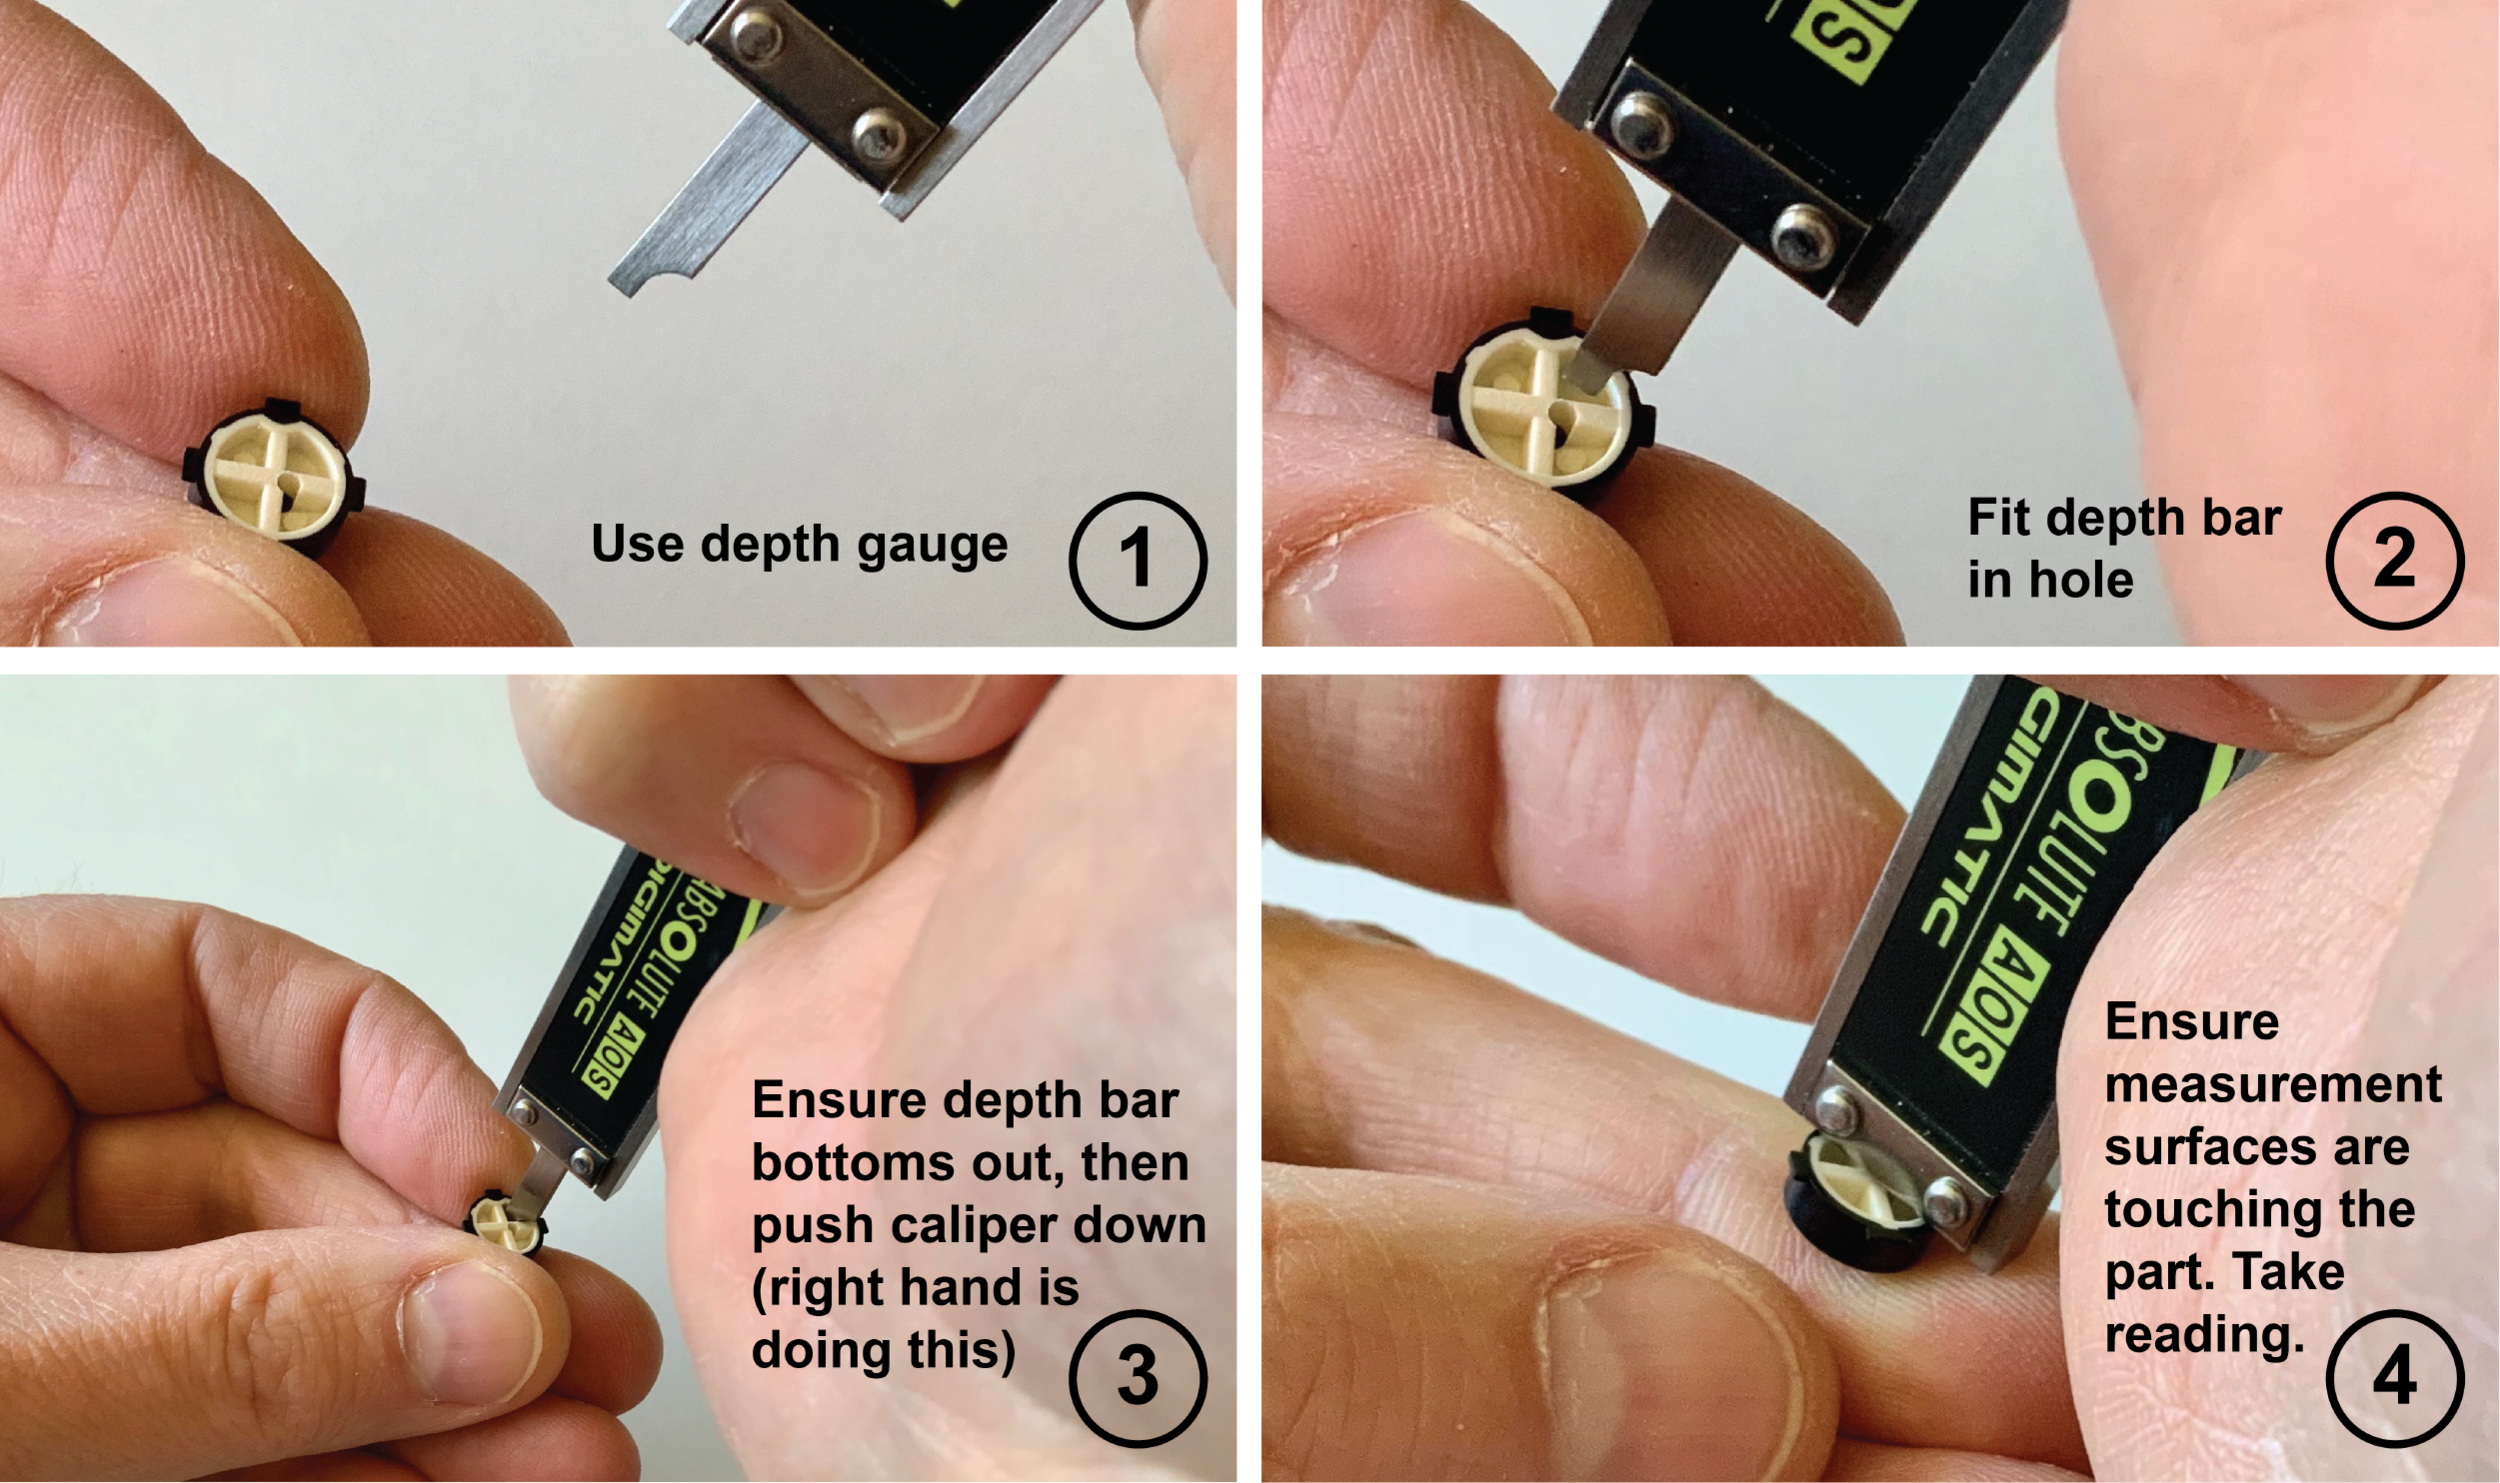
Depth measurements
If the depth you want to measure can be accessed by the depth bar, a measurement can be made. Features smaller than that shown below would be unmeasurable with my pair of calipers. For large parts, when the step gauge can be used to measure depth, it is better than using the depth gauge since the step gauge has larger measurement surfaces that can be better stabilized.
Deviation measurements
A direct measure of a part’s deviation from an expected (or designed) value can be made easily with a pair of digital calipers as shown below.

Corner/edge radius estimation
It’s common to need to know the radius of an edge or corner. Unfortunately, calipers are not designed for such measurements, but an estimation can be made.

Measuring soft and very flexible parts
The flexibility of an object can significantly complicate any attempts to measure its geometry. The key is to make sure the calipers are not deforming the part while measuring.

Measurement error and mitigation
To increase confidence in your measurements, it is valuable to make multiple measurements of the same feature, calculate the measurement average, and report the number rounded to the resolution of the instrument. Most digital calipers have a resolution of 0.01 mm.
As with any instrument, it is important to understand the degree to which measurements can be trusted. An instrument’s accuracy is its ability to produce readings that reflect a true value. Digital calipers typically have a 0.02 mm accuracy. Further, it’s valuable to consider an instrument’s ability to repeatedly produce the same reading when a measurement is made multiple times. The calipers I use have a repeatability of 0.01 mm. These numbers can be found in the literature provided by the manufacturer of your calipers.
I am confident that using the practices described in this article will reduce user error, and make the caliper a powerful tool in your work. As you try to implement these practices, I also recommend working to reduce user bias by clearing your mind of what you hope the reading will be, and simply make the measurement and report it.
Resources:
I use the Mitutoyo 6 inch caliper, and am very happy with it. This is a high-end pair of calipers.
I know various people who have used an value the less expensive pair here: Vinca 6 inch
From time to time perform a basic maintenance check on your calipers (https://youtu.be/sxw9fTV8bJ8).