To download this video and make it into a gif (make the gif as large as the video is and then you can resize it later)
If you have any questions you can ask them on here!
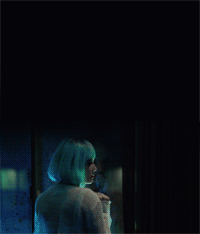
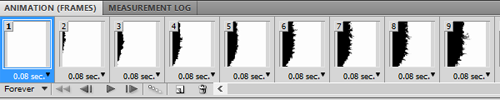
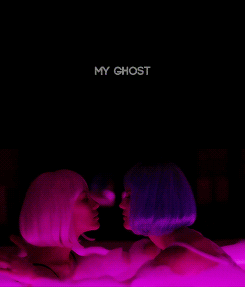
First, you need to make the two gifs that you want and make sure that these gifs and the gif of the ink spill video all have the same number of frames. Try not to have too many frames or it’ll be too big (for the ink gif, screencap it every four frames or it’ll be too long) These are the ones that I’m using, they’re 500x586px
If you extended the canvas and colored in the top of the gif like I did, you need to duplicate the layer that you colored so you have the same amount of that layer as you do frames. So my gif has a layer that I colored like this:
And my gif has 23 frames, so I duplicated that Layer 1 until I had 23 of them.This goes for any kind of texture or text that you put on the gif. I know this is really confusing so if you don’t get it, don’t hesitate to ask.
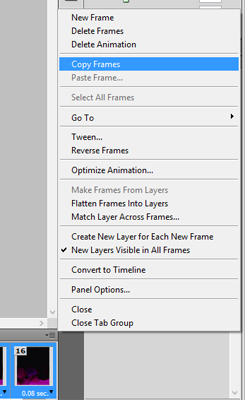
Then, choose the gif that you want to be on top, select all the frames, and then copy frames
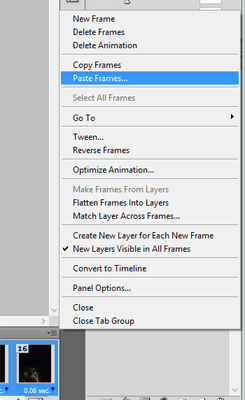
Then go to your second gif, select all frames, and then paste frames and select paste over frames
Then do the same with your ink gif. Copy and paste the frames over the selection. If you need to resize it to be smaller now is the time to do so.
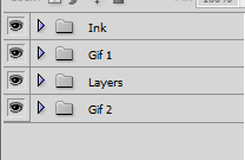
So at this point, you should have your bottom gif, your top gif with all the duplicated layers on top of that, and then the ink gif on top of all of it
Now, we’re gonna start to slowly erase out parts of the gif, frame by frame, to create the ink transition.
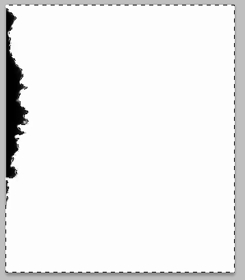
As you can see, the first frame doesn’t have any ink in it, so we’re going to skip that one and start on frame 2. Select both the frame 2 and layer 2 of the ink gif, and using the quick selection tool, select all the white so that it looks like this
Then, turn off the visibility of the ink layer so we have this
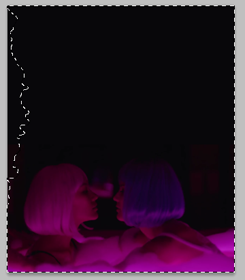
Then go to your top gif layers, and select the layer 2 (since this is the second frame) and click layer mask
and you should end up with this
Now make sure when you are doing this, that you have the right frames and layers selected. Frame 2 goes with layer 2, frame 3 goes with layer 3, and so on.
Then you just keep doing this with every frame. Make the ink gif visible again, and start the process over with frame three. So again, have the third frame, and the third layer of the ink selected, and with the quick selection tool, select all the white. Turn off the visibility of the ink gif, and then go to the third layer of the top gif, and hit layer mask. Then you just keep doing this until you’ve done all the frames.
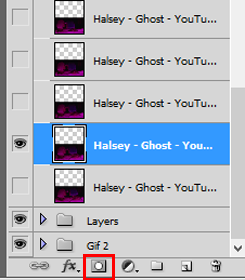
Now remember those 23 frames that we duplicated? Well, we have to erase those individually too. But before we do that, we need to make sure that each layer is only visible on the corresponding frame (that’s why we needed 23). So frame 1 should only have the first layer visible, frame 2 should only have the second layer visible, and so on. Then you can go to each layer and do the layer masks.
Again, if you have text, you do the same thing and make sure there is an individual text layer for each frame.
Then you color and sharpen as you normally would and tada
Again, I know this was probably really confusing so feel free to ask me any questions here!
 antoniosvivaldi
 joeytrlbiani-archive
 kimsori
 mysticsrose


 waningcrescentserenade liked this
  kennadeek liked this
 oppositesignal reblogged this from completeresources
 coldspoons liked this
 mvthr liked this
bolyarka reblogged this from completeresources
shiomatsuzaka liked this
 yong-flight reblogged this from completeresources
  baddiessa liked this
  phoroirkr reblogged this from completeresources
  jaeyong liked this
  iwouldservehim-main liked this
  ttoya liked this
 noellerps reblogged this from neonhelper
 kiernwalker liked this
 gcldenhxurs liked this
 yingmindy liked this
 neonhelper reblogged this from rphelper
indestinatus liked this
 alainbeejuno liked this
 not-your-ssunflower liked this
rodgersteves liked this
starslake liked this
 idliketothankyou reblogged this from completeresources
  hipster-lab reblogged this from rphelper
  sincerely-meh liked this
 lalitxs reblogged this from halseydaily
 dinomight liked this
 el-ofthevoid liked this
writerofmyths liked this
winona-ryder liked this
 flxshtress reblogged this from kissps
  pstools liked this
  tvandmusicals liked this
  halseydaily posted this