
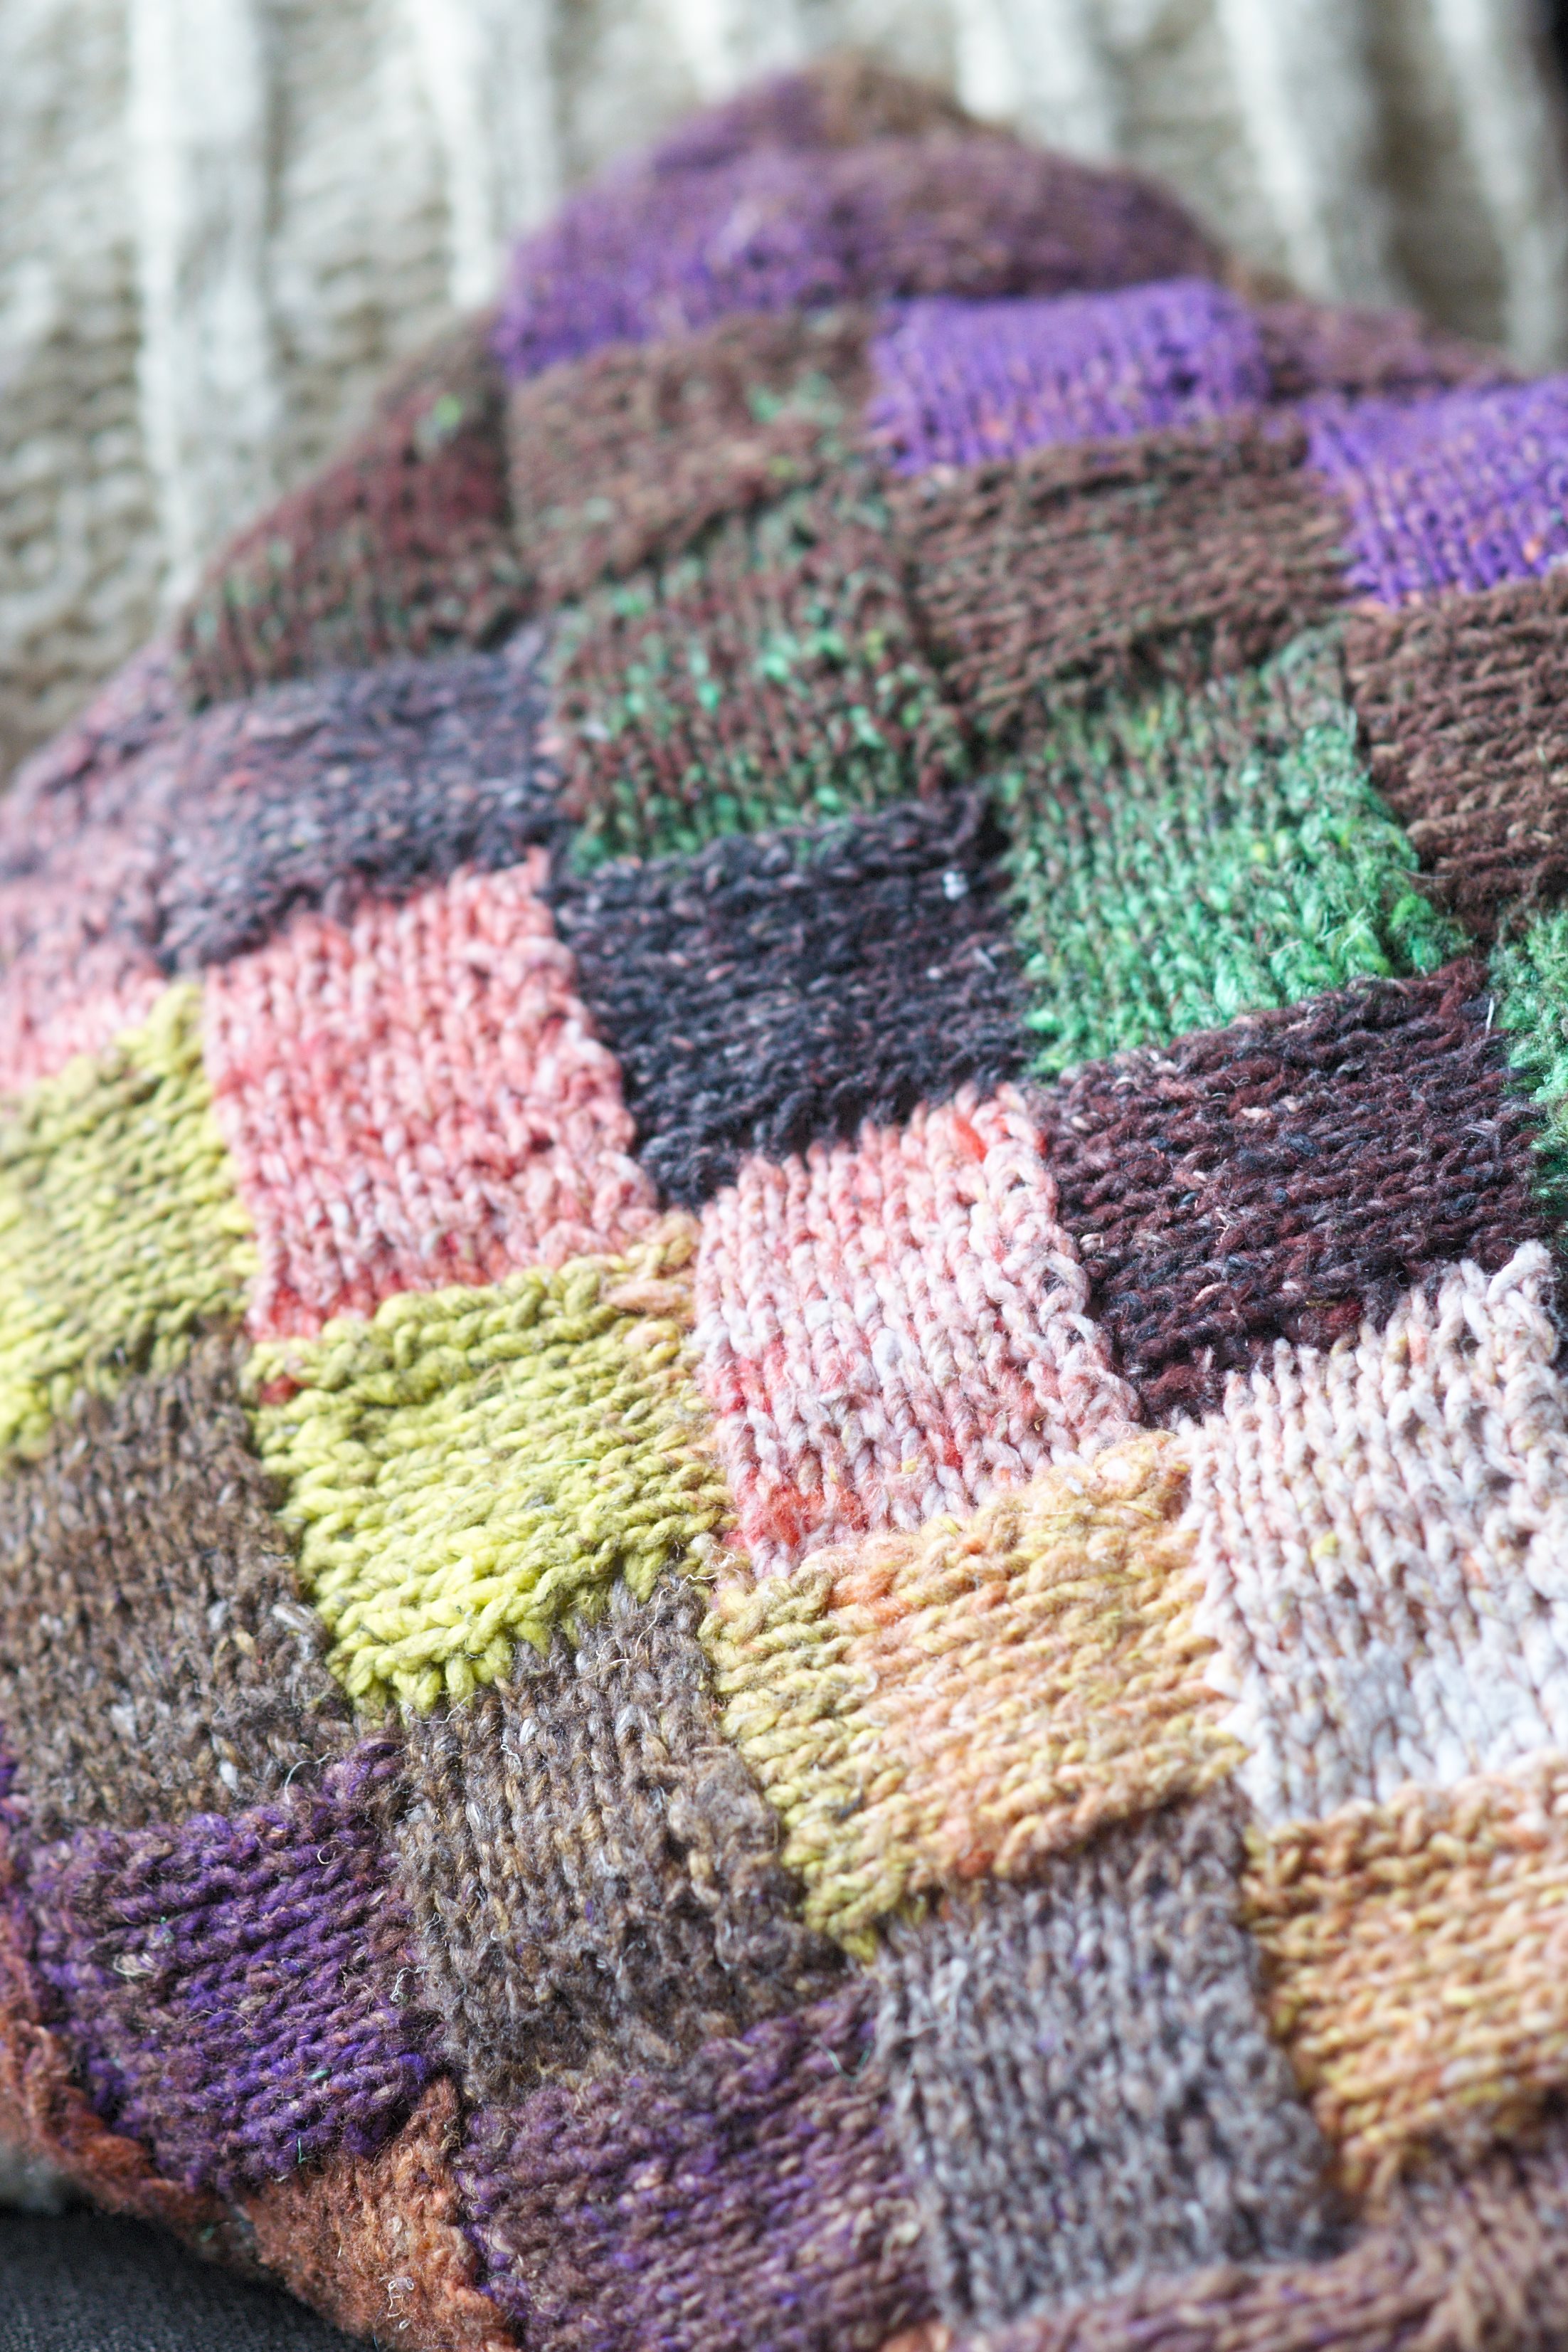
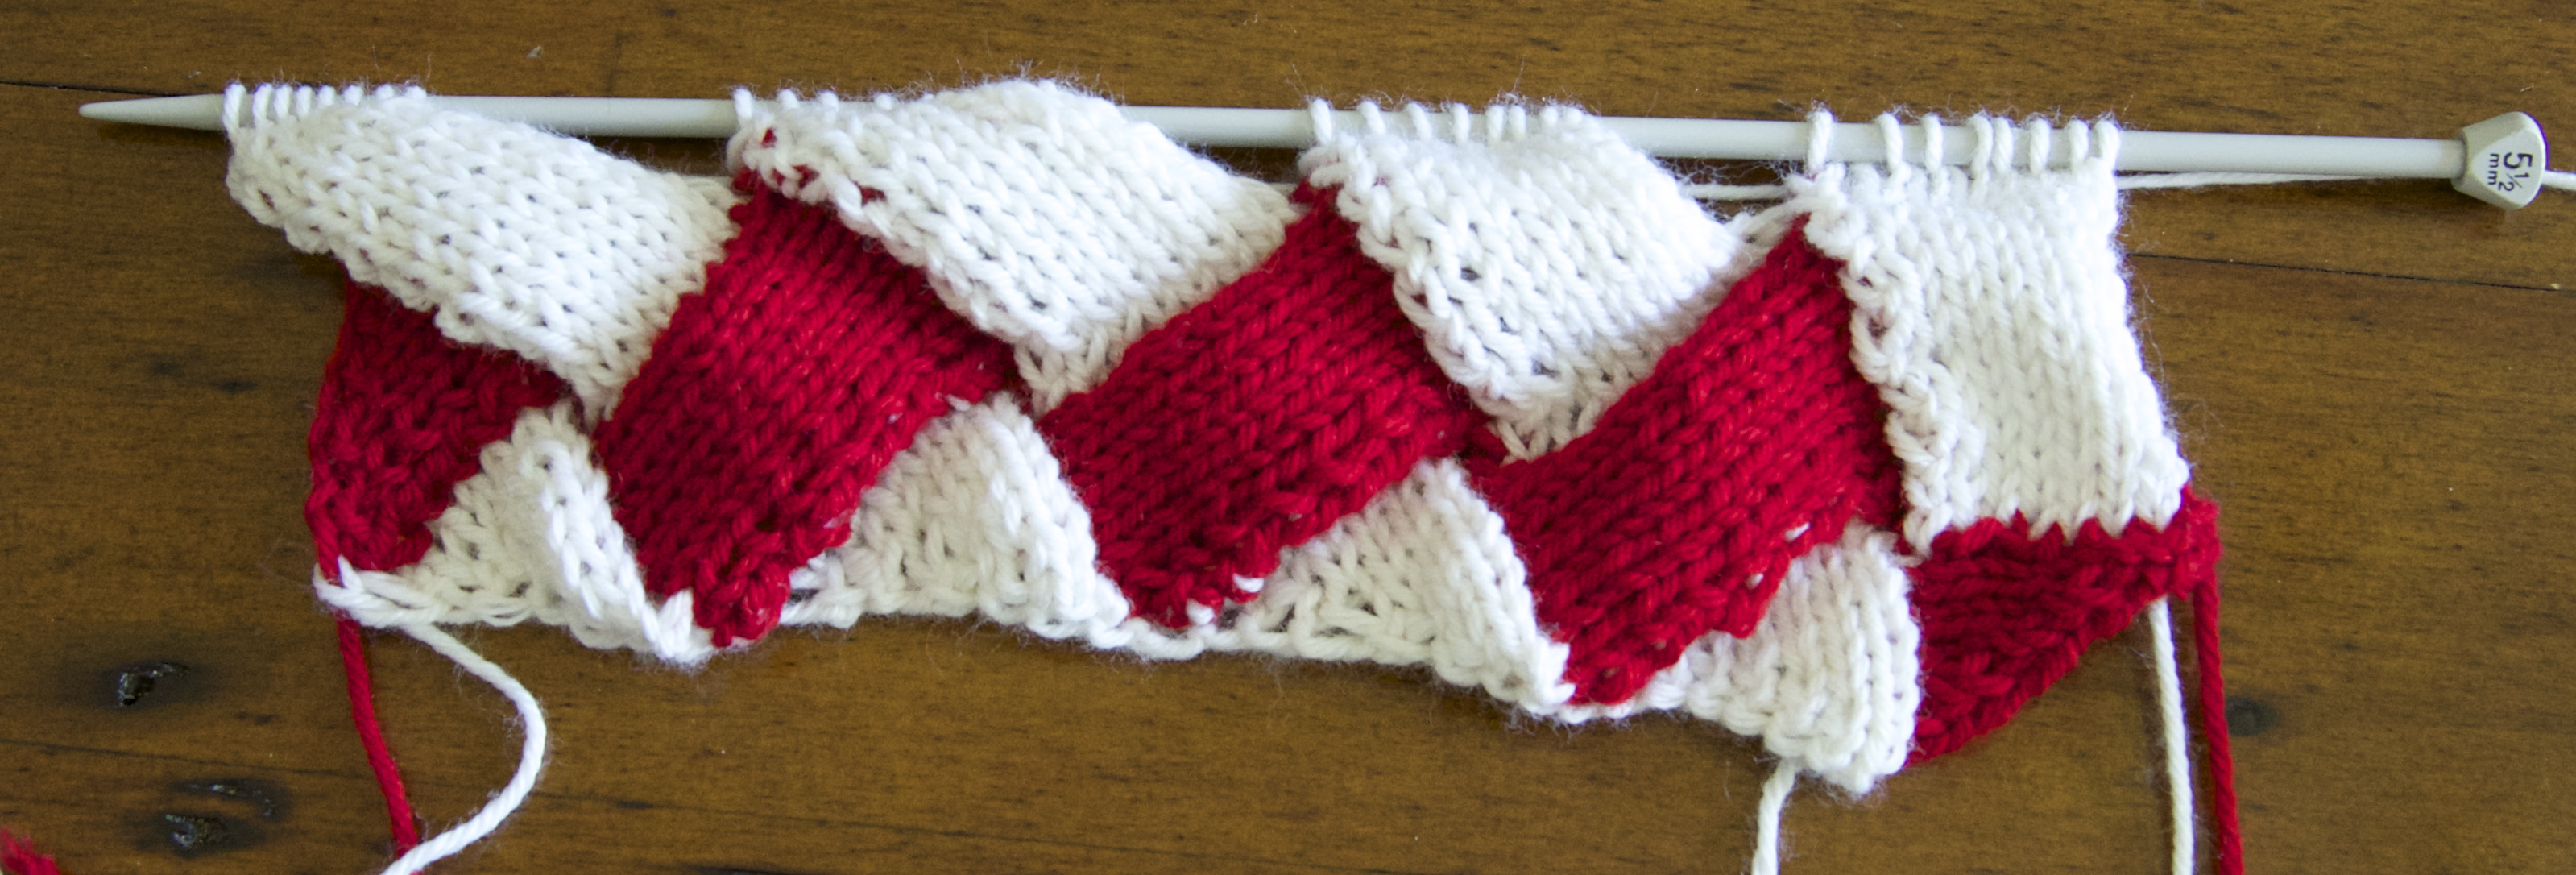
Entrelac cushion in Noro Taiyo
Entrelac is a knitting technique that creates a fabric that appears to be woven. In reality it’s made by knitting in a series of tiers, each constructed out of parallelograms joined to their neighbours. The beauty of entrelac is that it requires a relatively small number of basic knitting skills to execute. If you can knit, purl, k2tog, ssk, p2tog, kfb and pick up stitches you can entrelac. Entrelac is very challenging to design with (the long repeats make for challenging shaping), but reasonably simple to execute.
My internet research, couldn’t unearth the origins of this technique, but it became popular in the late eighties. Originally, most entrelac patterns called for you to change colours each tier (like I did in the accompanying photo tutorial). However, I favour the even easier way to achieve all those colours: a self striping yarn, with long sections of colour, like Noro. It isn’t only easier, it achieves a more organic effect, with colours blending into each other, rather than changing abruptly.

Entrelac socks (from ravelry)
There are lots of entrelac patterns on raverly, including these socks, from Sock Knitting Master Class, and while I greatly admire the mastery and creativity, I’m not surprised that it’s the least popular pattern in the book (with only 5 projects on ravelry). Some may be intimidated by how complicated they look (but really – entrelac is easy!) and not everyone will want to wear something this wacky.
Entrelac can be a bit bumpy and bulky, making it poorly suited for fitted garments, that you want to flatter the body beneath. Entrelac is best suited to flat garments, or things that require little shaping, like hats, cushions and cowls. While, I love my entrelac hat,

Entrelac wedding shrug
my favourite entrelac project is the cushion, pictured at the top. It’s a perfect beginner project: just buy or make a cushion, then knit a long rectangle in entrelac that is the width of the cushion, and double it’s lenghth. When you are done, fold over the cushion and seam the three edges. It makes a beautiful quick, gift (and one I’ve given three times!) Another entrelac favourite?This surprising discovery! How beautiful is that wedding shrug by Alex Lawson? It makes me wish I knew a knitwear loving bride to make it for!
So how do you do it?
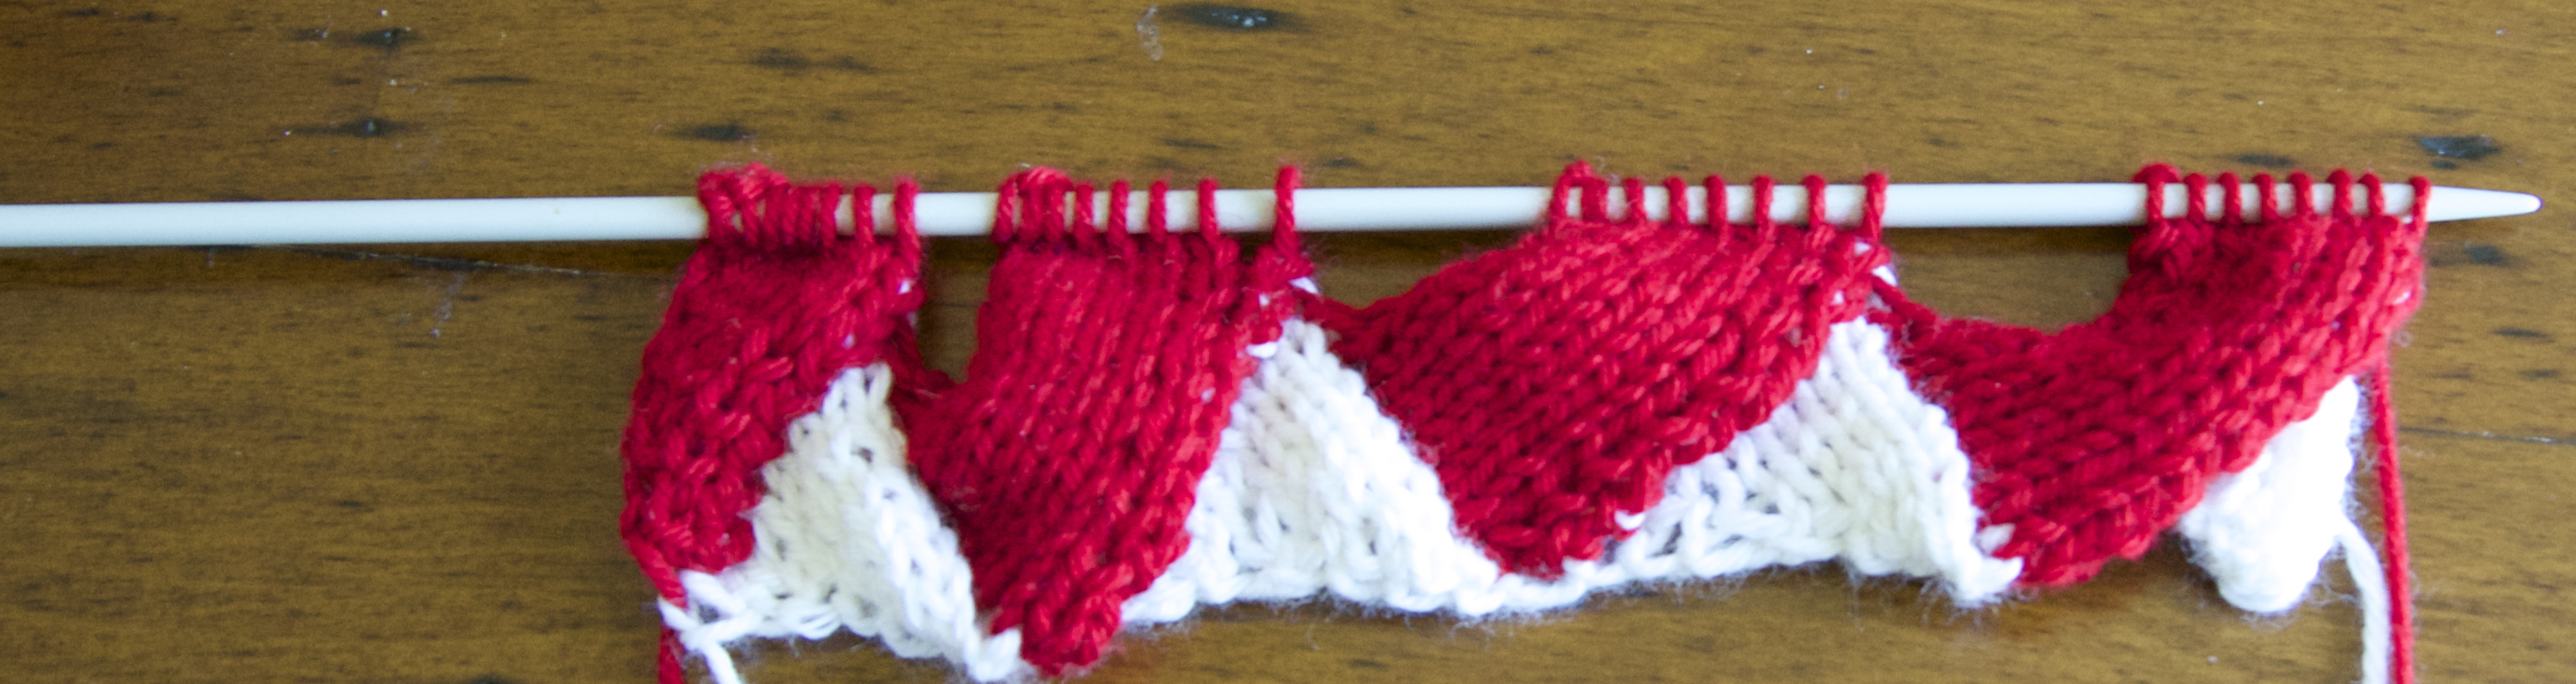
Here, I cast on 32 stitches, since each square is made of 8 stitches. The first section is made of triangles (to provide a flat edge). You will create the triangles one at a time, by knitting (and purling) back and forth, and then moving on to the next triangle:
- k2, turn,

The first base triangle (8 stitches on the right needle, 24 on the left)
- p2, turn,
- slip 1, k2, turn
- p3, turn
- slip 1, k3, turn,
- p4, turn
- slip 1, k4, turn
- p5, turn
- slip 1, k5, turn
- p6, turn
- slip 1, k6, turn
- p7, turn
- slip 1, k7, do no turn
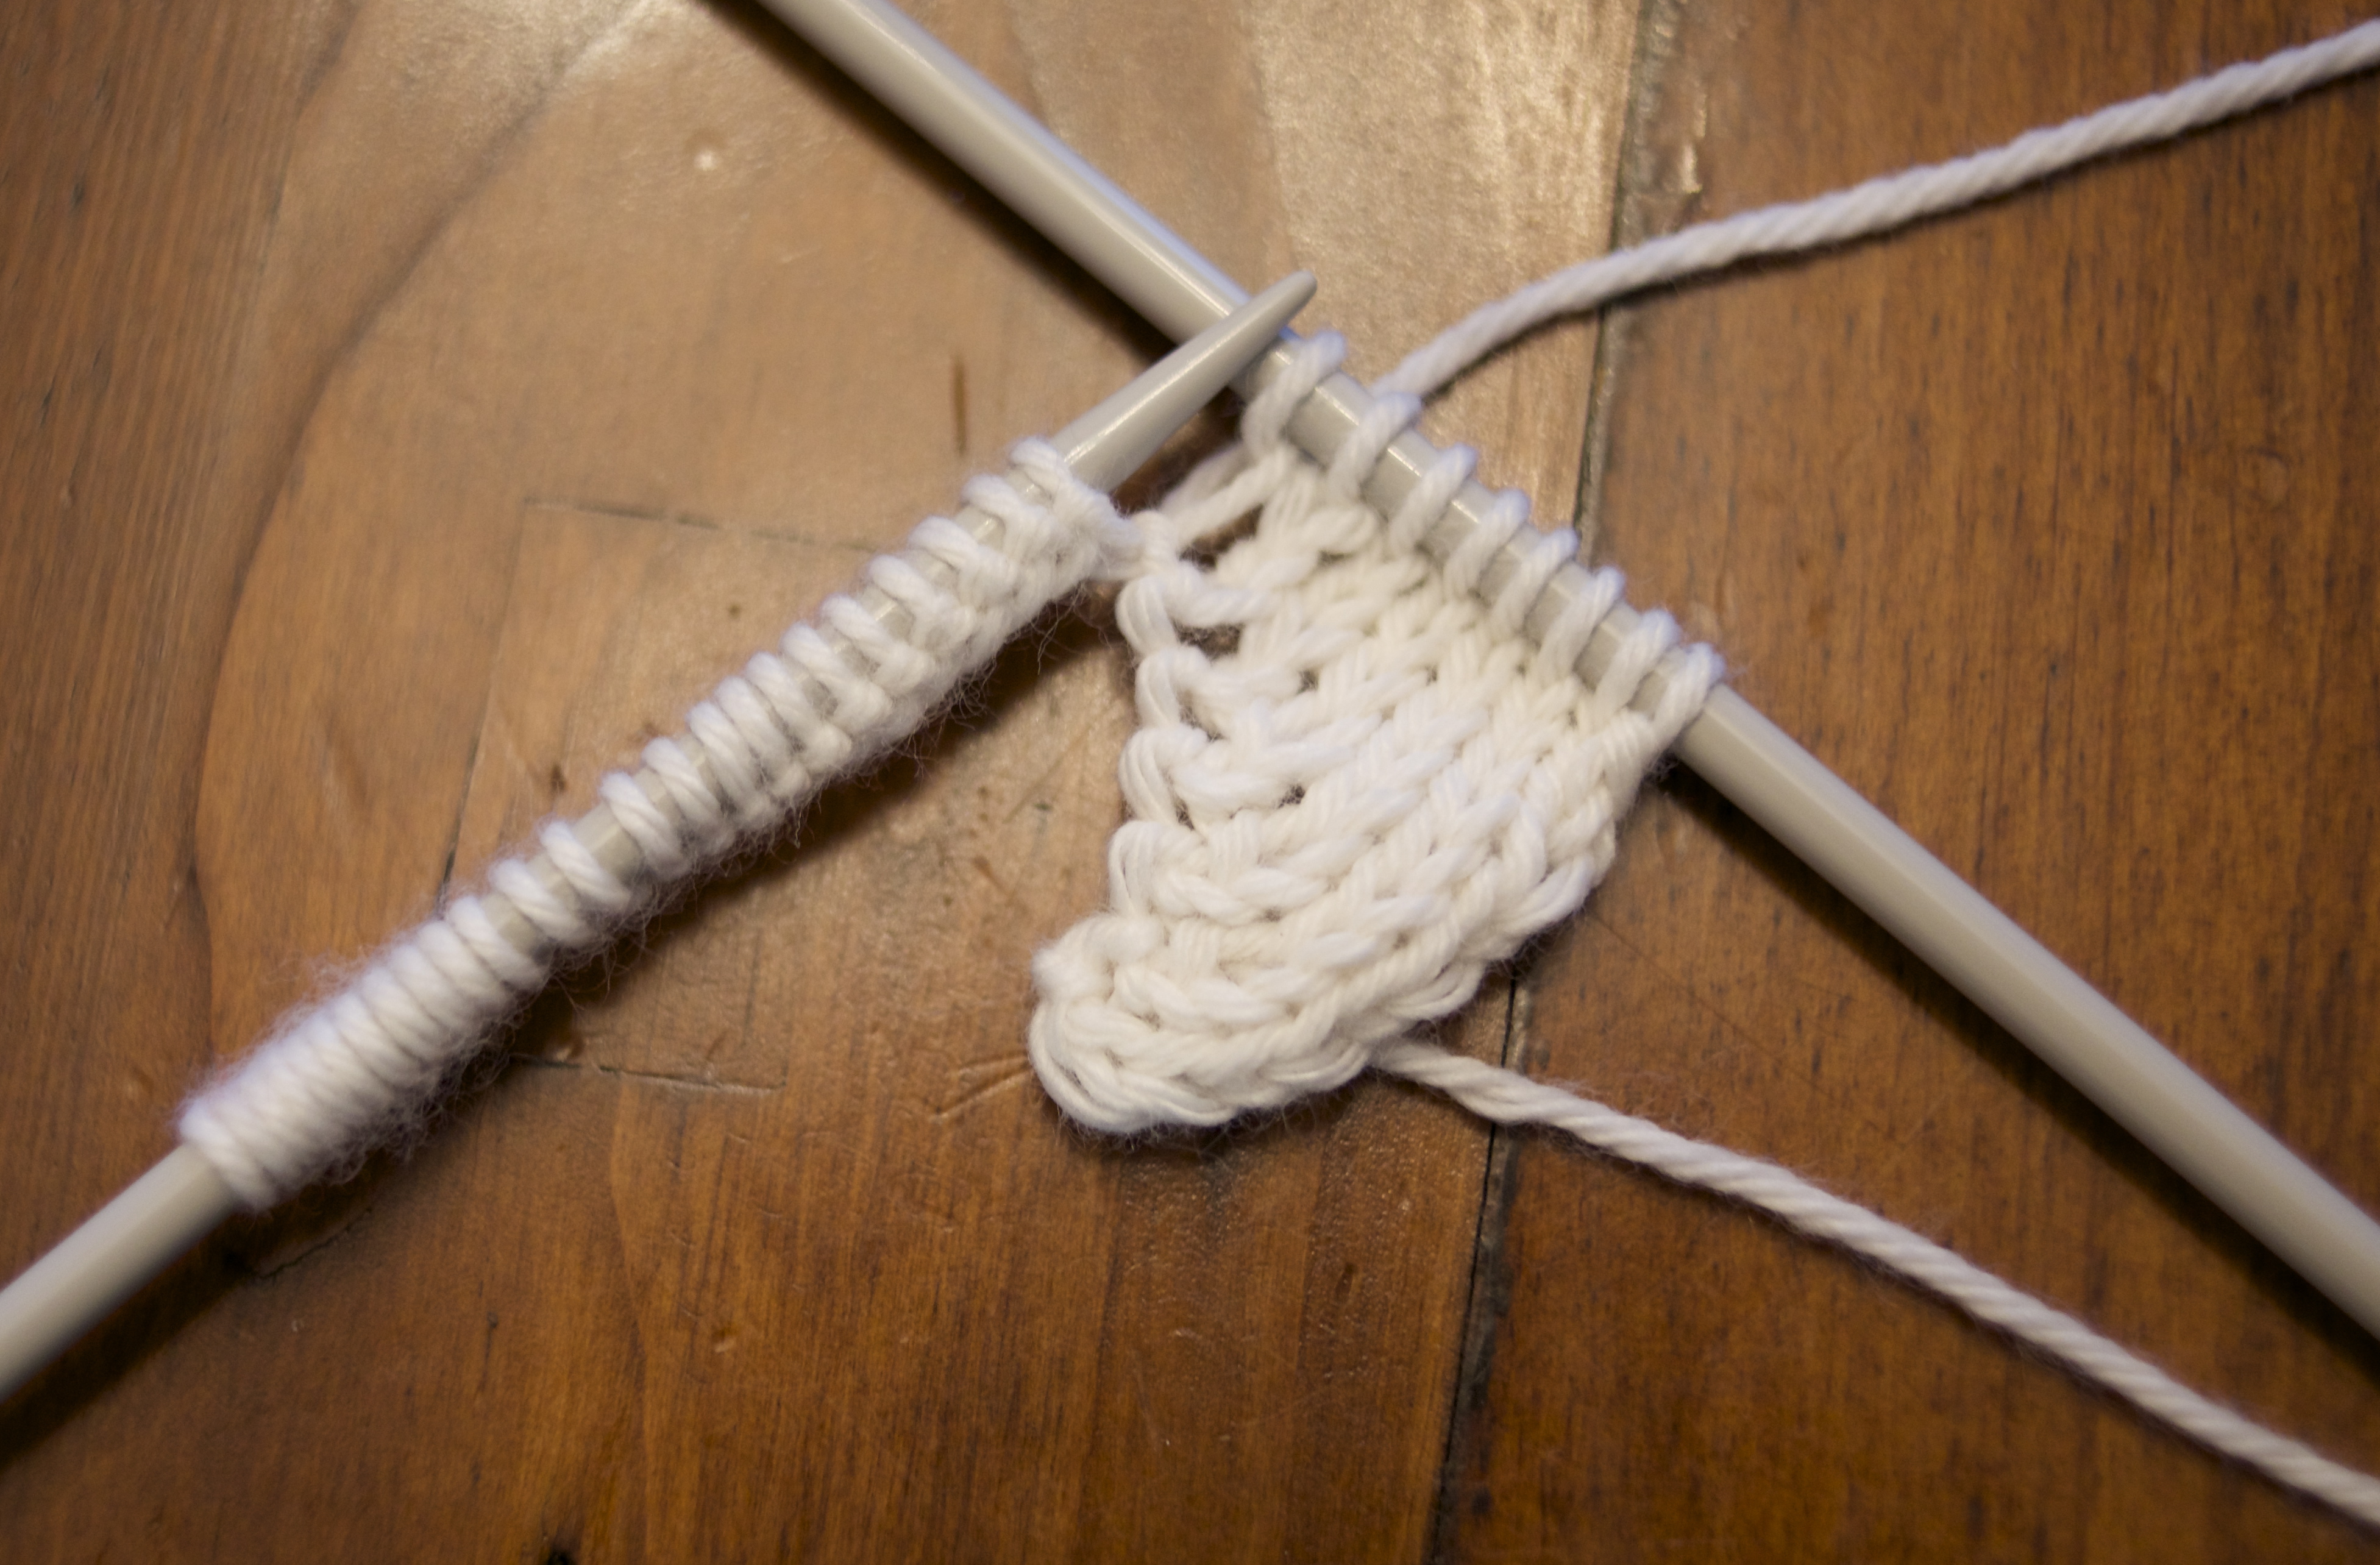
I like to slip at the beginning of each knit row, to give myself a looser edge to pick up into. Now move on to the next triangle, by leaving the completed triangle on your right hand needle and knitting 2 more and turning (your now back at #2). Repeat steps 2 to 13 to create the second triangle (and so on).
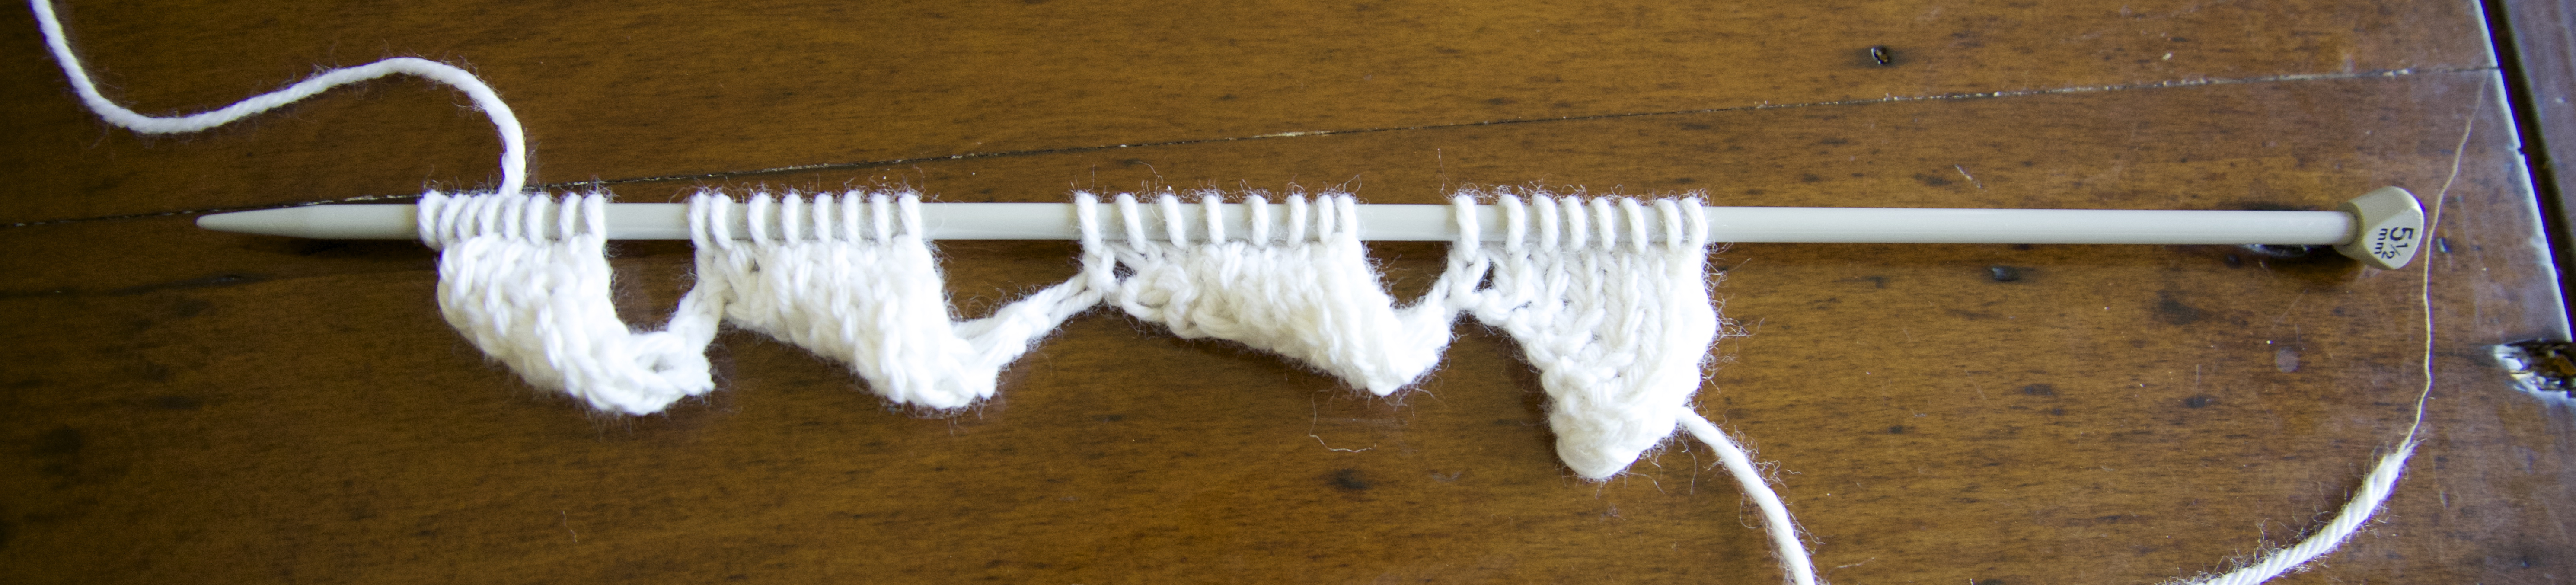
The four base triangles (each 8 stitches each, with a gap in between)
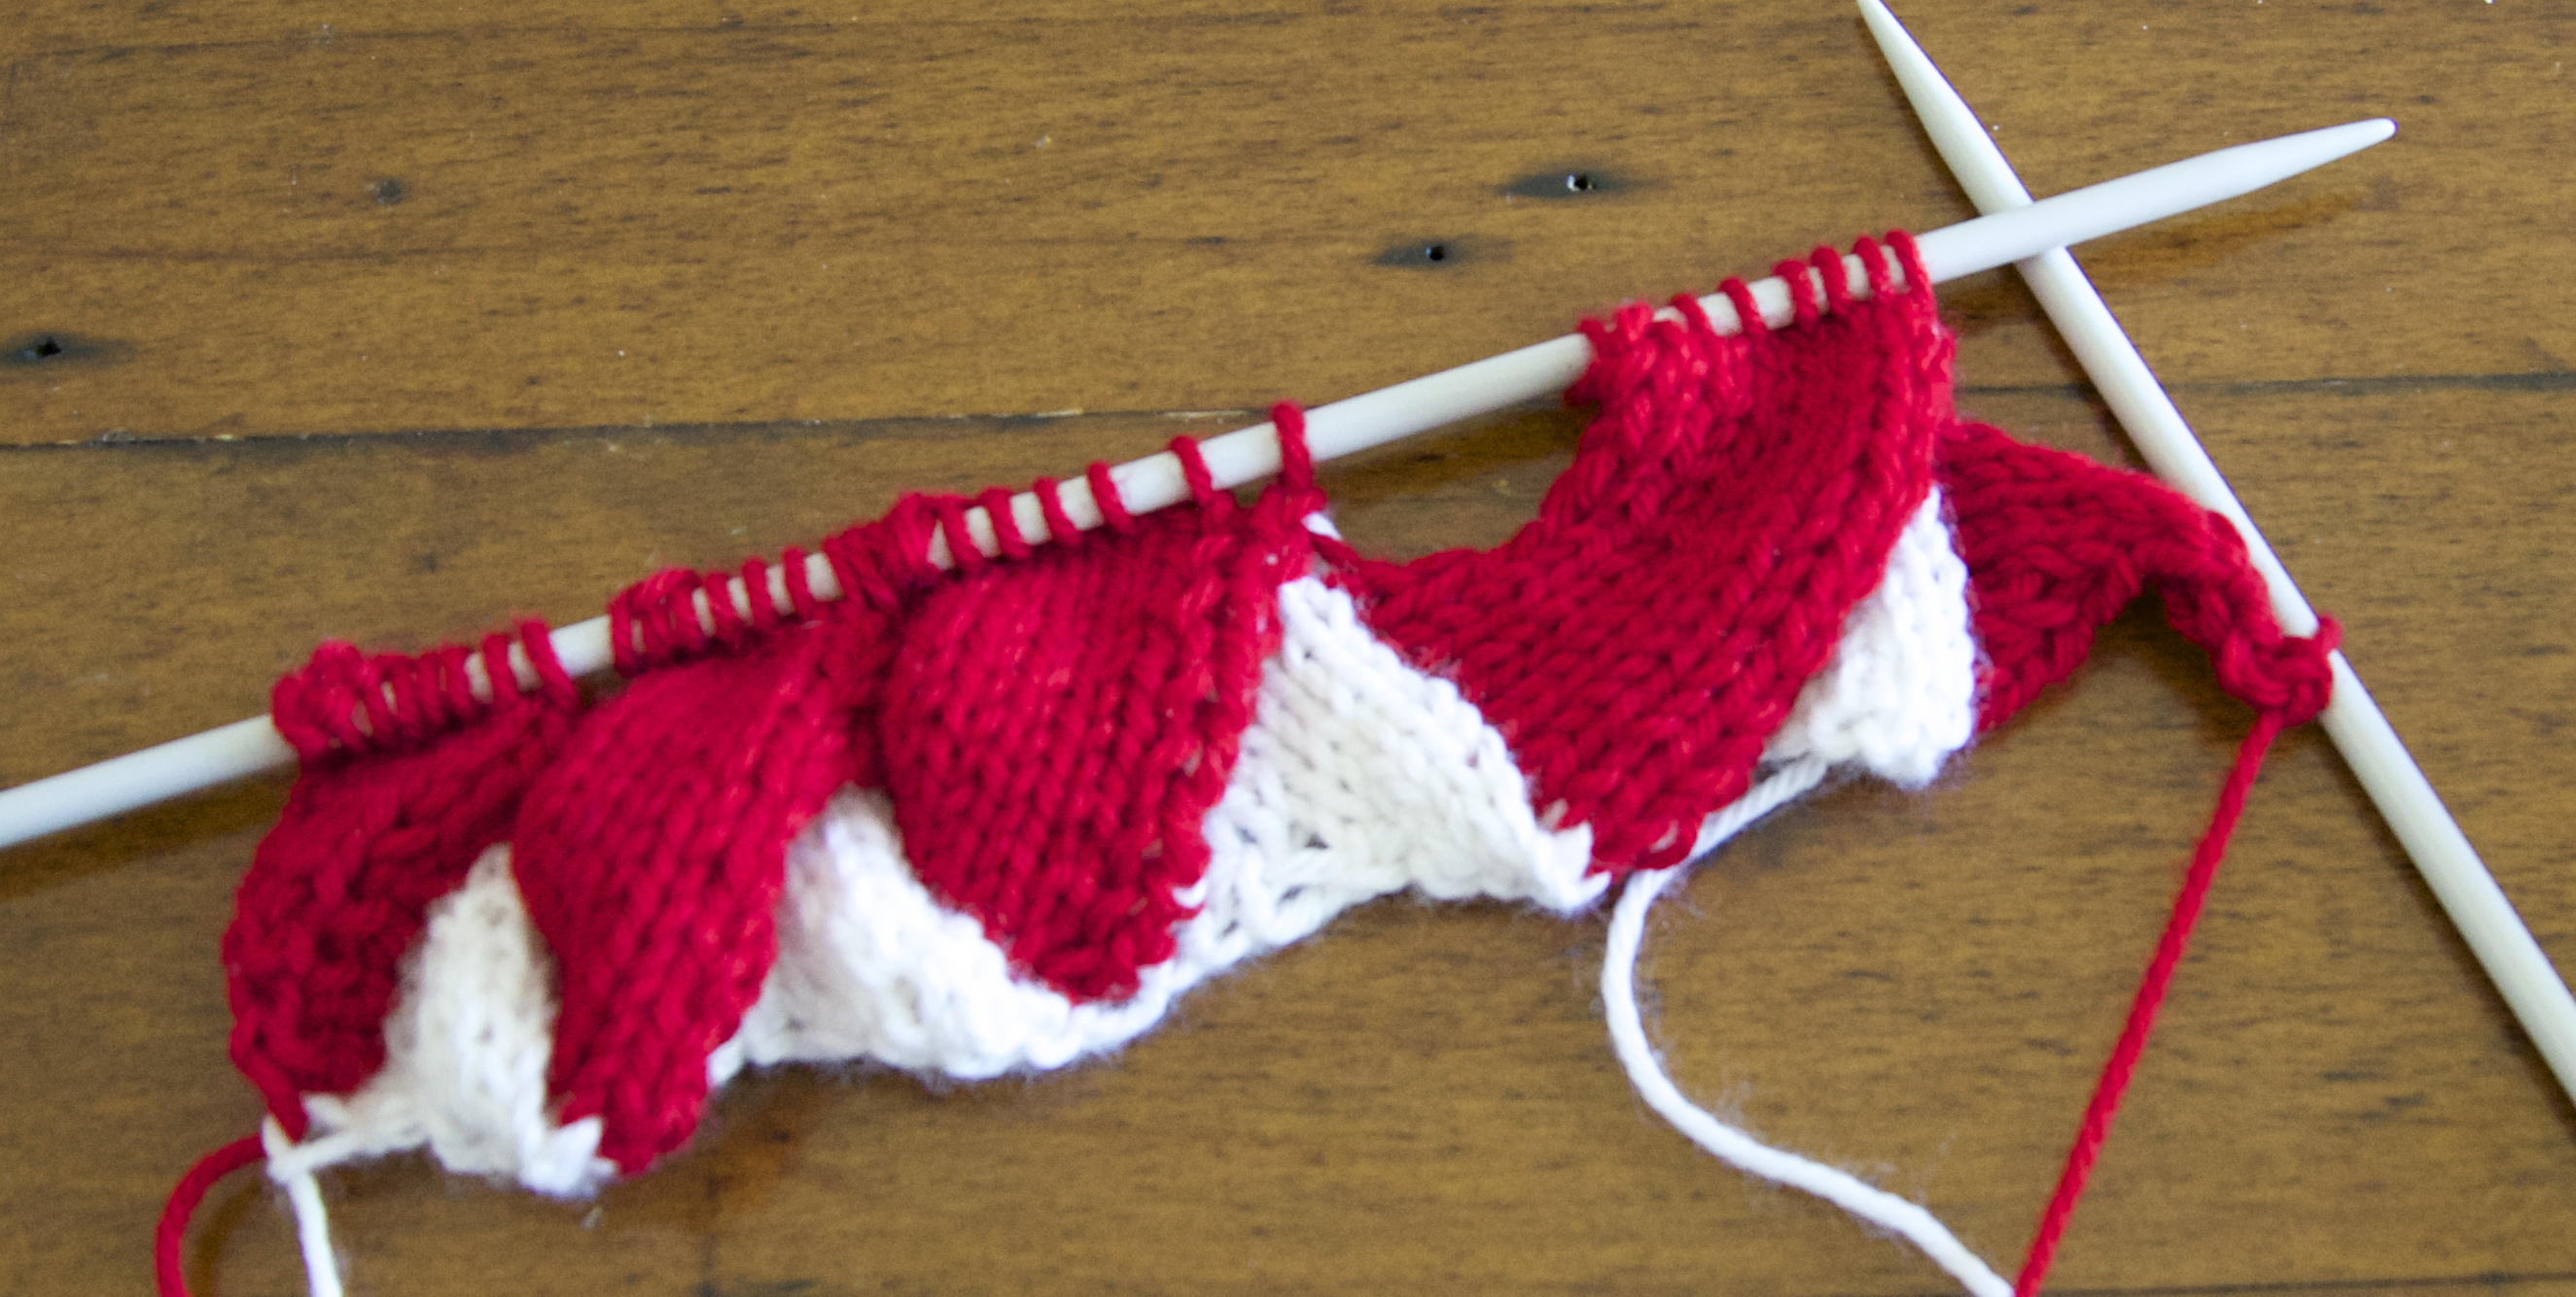
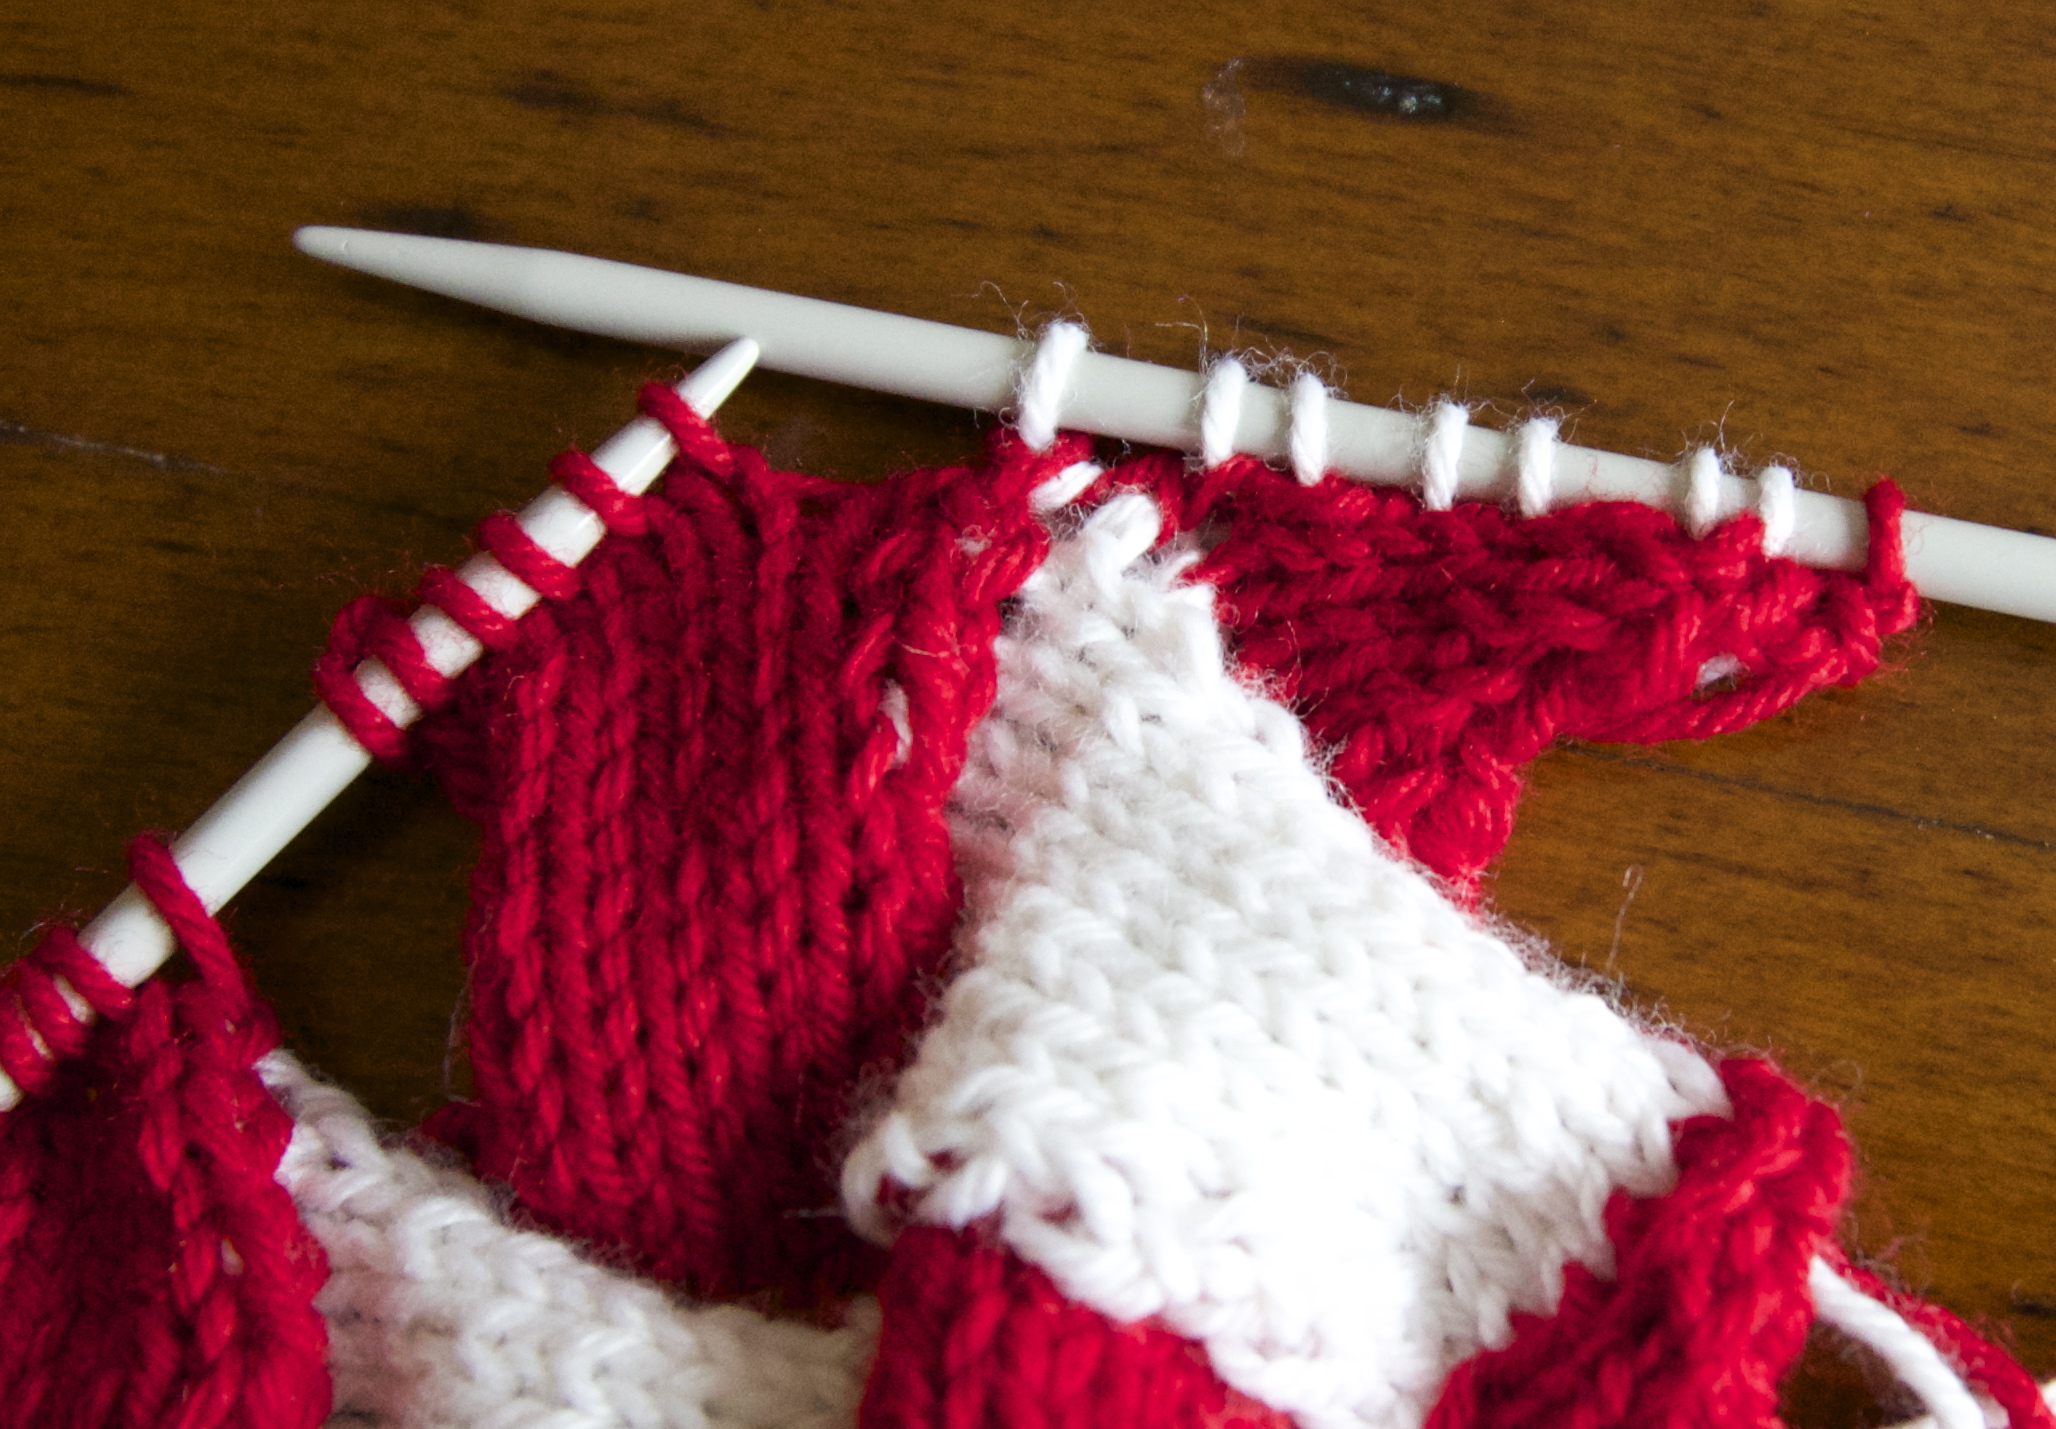
After creating 4 triangles, I switched to red yarn and moved on to the first tier (this one made of parallelograms). Because my piece is flat this tier will include triangles at the beginning and the end of the tier to provide flat edges. I changed to red for the first tier, and my instructions will now identify stitches from this tier as “red”.
- p2, turn
- knit front and back (kfb), k1, turn
- p2, p2tog, turn *notice that now red stitches are replacing white ones, but the overall number doesn’t change, you increase on the right side, then decrease on the wrong
- k1, kfb, k1 turn *now you have 4 red stitches
- p3, p2tog, turn
- k2, kfb, k1, turn
- p4, p2tog, turn
- k3, kfb, k1, turn
- p5, p2tog, turn
- k4, kfb, k1, turn
- p6, p2tog, turn
- k5, kfb, k1 turn
- p7, p2tog
Now you’ve created the triangle that begins this tier. You should still have 32 stitches (8 red, 24 white). You may be starting to see the pattern here. With a little practice, entrelac is very easy to master, since each row follows the same pattern as the previous row on that side, just one stitch longer. With the wrong side facing you, you are now ready to start the first parallelogram, by picking up six stitches along the edge of the first triangle. It should look like this:
The wrong side of the work, here you can see the first red triangle and the 8 picked up stitches, along the edge of the base triangle
Now to create the first parallelogram
- k8, turn
- sl 1, p6, p2tog, turn
- Repeat these two steps 7 more times. It should look like the white stiches of the next triangle are disappearing under this red parallelogram. You should also be creating a gap between the first set of 8 red stitches, and the second set of 8 red stitches.
- k8, turn
- sl 1, p6, p2tog, do not turn
You’ve finished your first parallelogram. You should have 32 stitches, and the wrong side of the work should be facing you. Pick up 8 stitches along the side of the next triangle, and repeat all the above steps to create another parallelogram. Continue creating parallelograms until all of your white stiches are replaced with red ones. After creating all of your parallelograms, you should have 32 stitches and it should look like this:
Most of tier 1 (in red). 32 stitches in 4 distinct groups
However, the first tier is not yet complete. You have replace all of your white base triangle stitches, with red tier one stitches, but another triangle is required to give the right side of this a flat edge. To create the final side triangle, pick up 8 stiches (with the wrong side facing you) and turn.
- k1, k2tog, k5, turn
- sl1, p6, turn
- k1, k2tog, k4, turn *you should be creating a gap between this triangle and the previous 8 parallelogram stitches
- sl1, p5, turn

A completed tier one. Not that there are actually 33 stitches now, 32 on the left needle and 1 on the right
- k1, k2tog, k3, turn
- sl1, p4, turn
- k1, k2tog, k2, turn
- sl1, p3, turn
- k1, k2tog, k1, turn
- sl1, p2, turn
- k1, k2tog, turn
- sl1, p1, turn
- k2tog
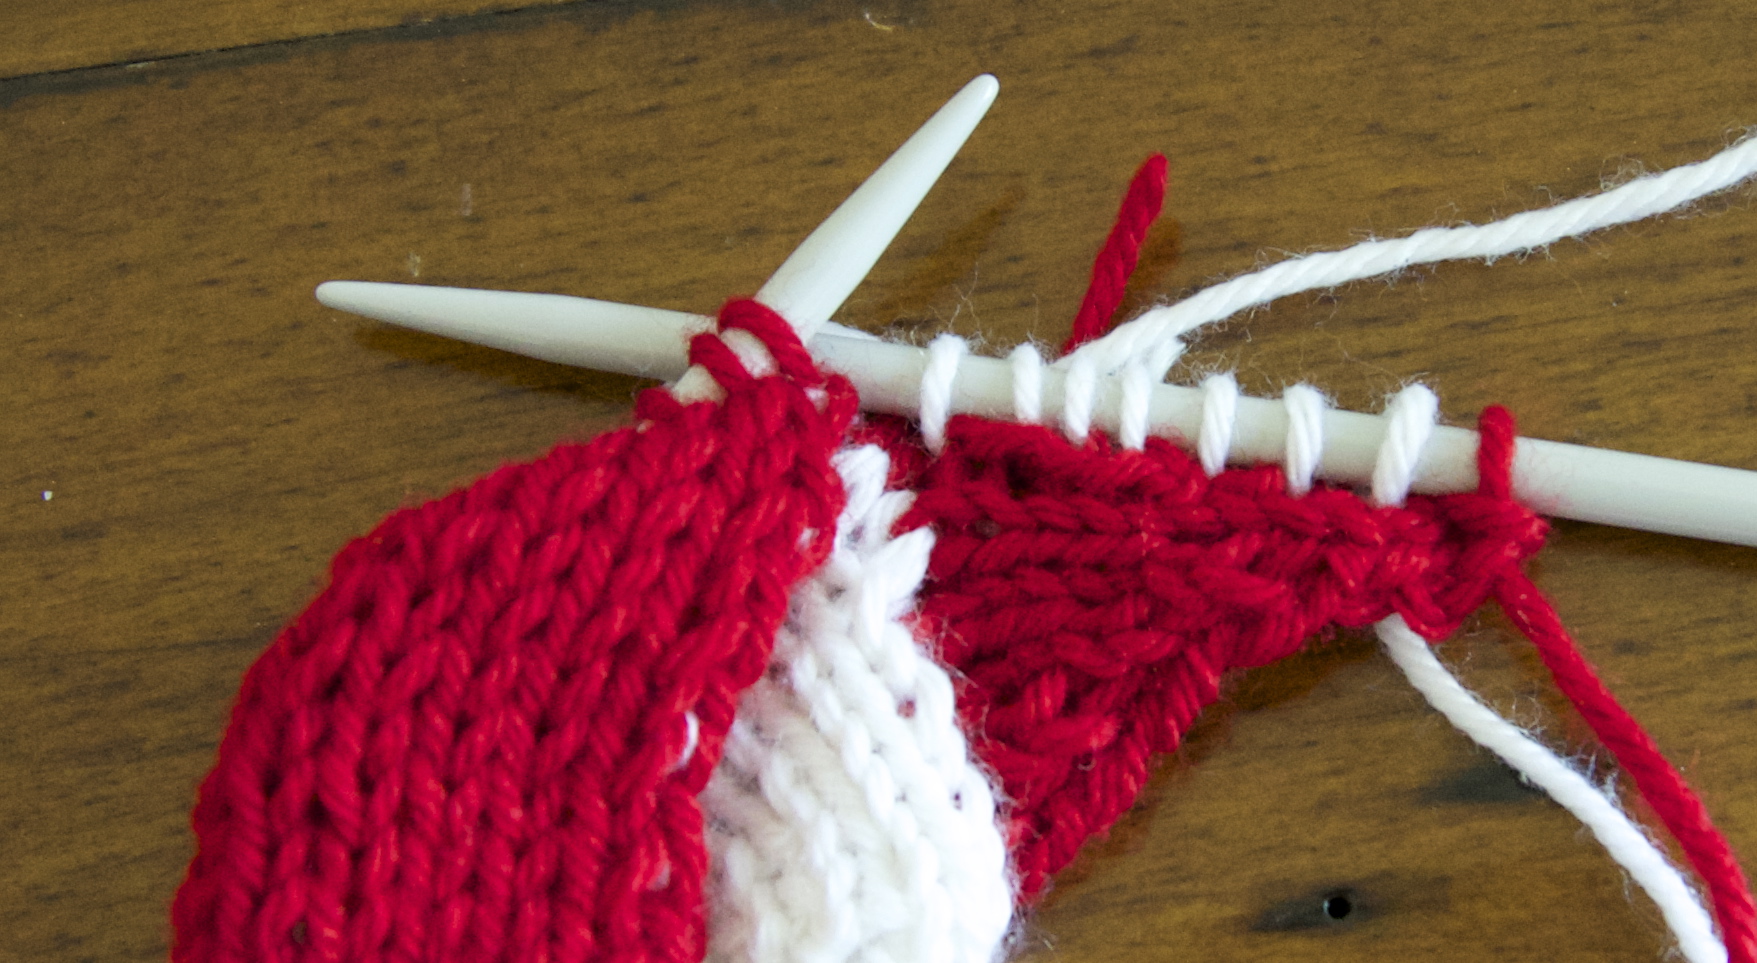
Showing the 7 picked up stitches. You know have 8 stitches on your right needle. 1 red from the last tier and 7 white that you just picked up.
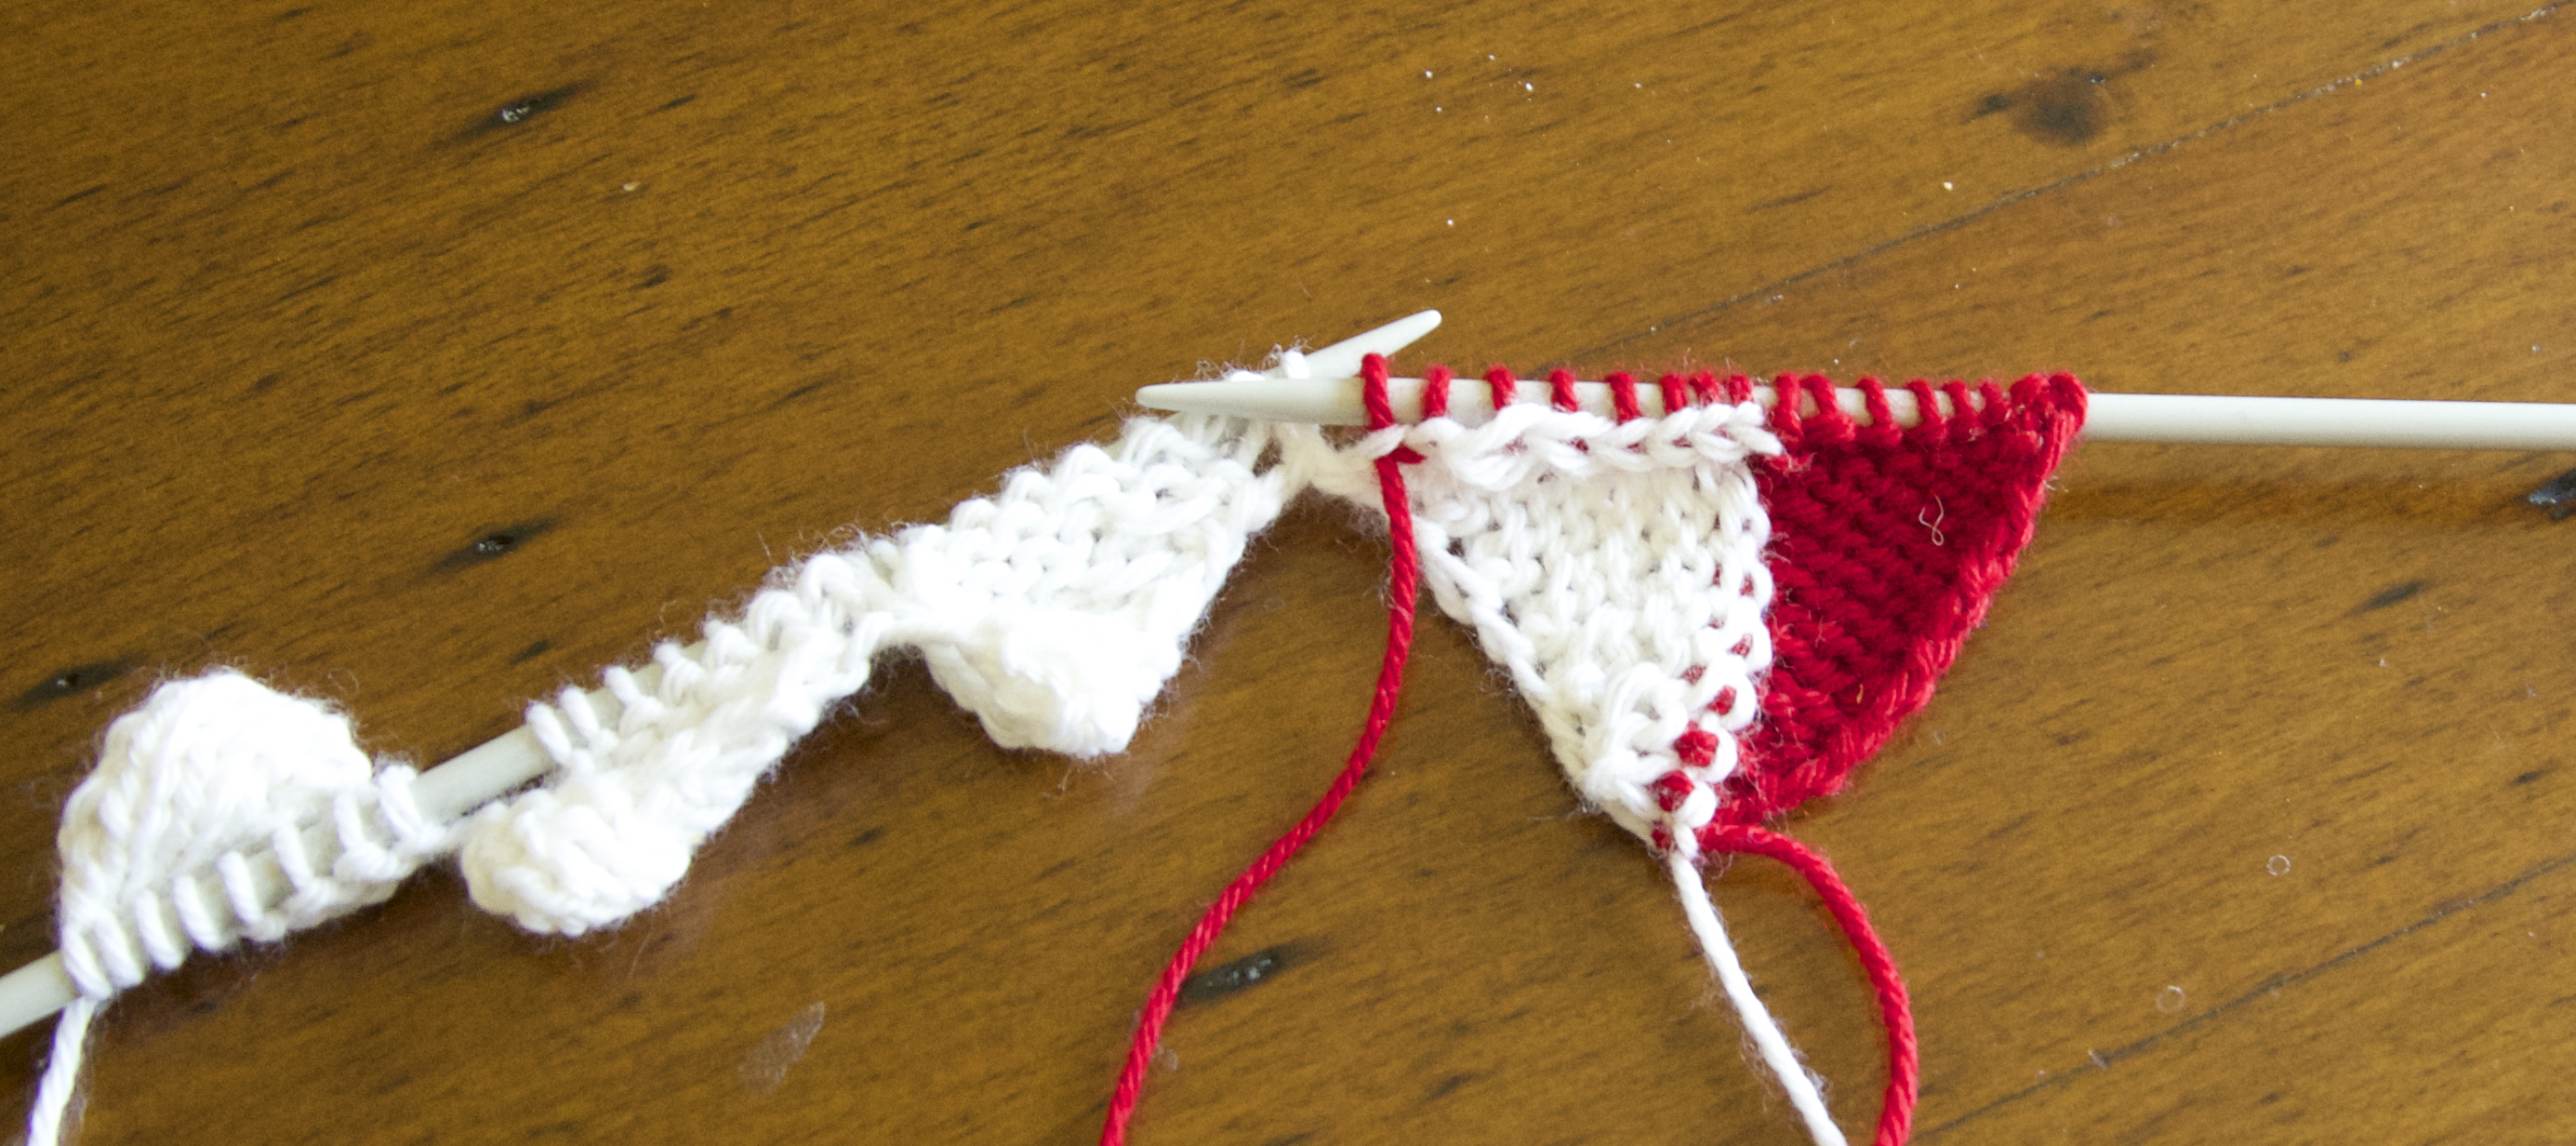
Now you are finished the first tier, you should have 33 red stitches. 32 on the left needle, and 1 lonely one from the final triangle on your right. To create the second tier, I changed back to white. Second tier stitches will be referred to as white stitches in this section. To begin the first parallelogram of this tier pick up 7 stitches, with the right side of the work facing you. You will only pick up 7, because you already had one stitch on your right needle. Turn your work.
- p8, turn
- sl 1, k6, ssk, turn
- Repeat the previous 2 steps until you have a white parallelogram, again it should look like the 8 red stitches from the previous tier, disappeared under this one. You should have 32 stitches again (8 white and 24 red)
Beginning the second parallelogram of tier 2
With the right side facing you, pick up 8 stitches along the side of the red parallelogram. Repeat the steps above to create a white parallelogram. Continue across the work until you have 32 white stitches, and no red ones. You don’t need any side triangles on even numbered tiers. It should look like this:
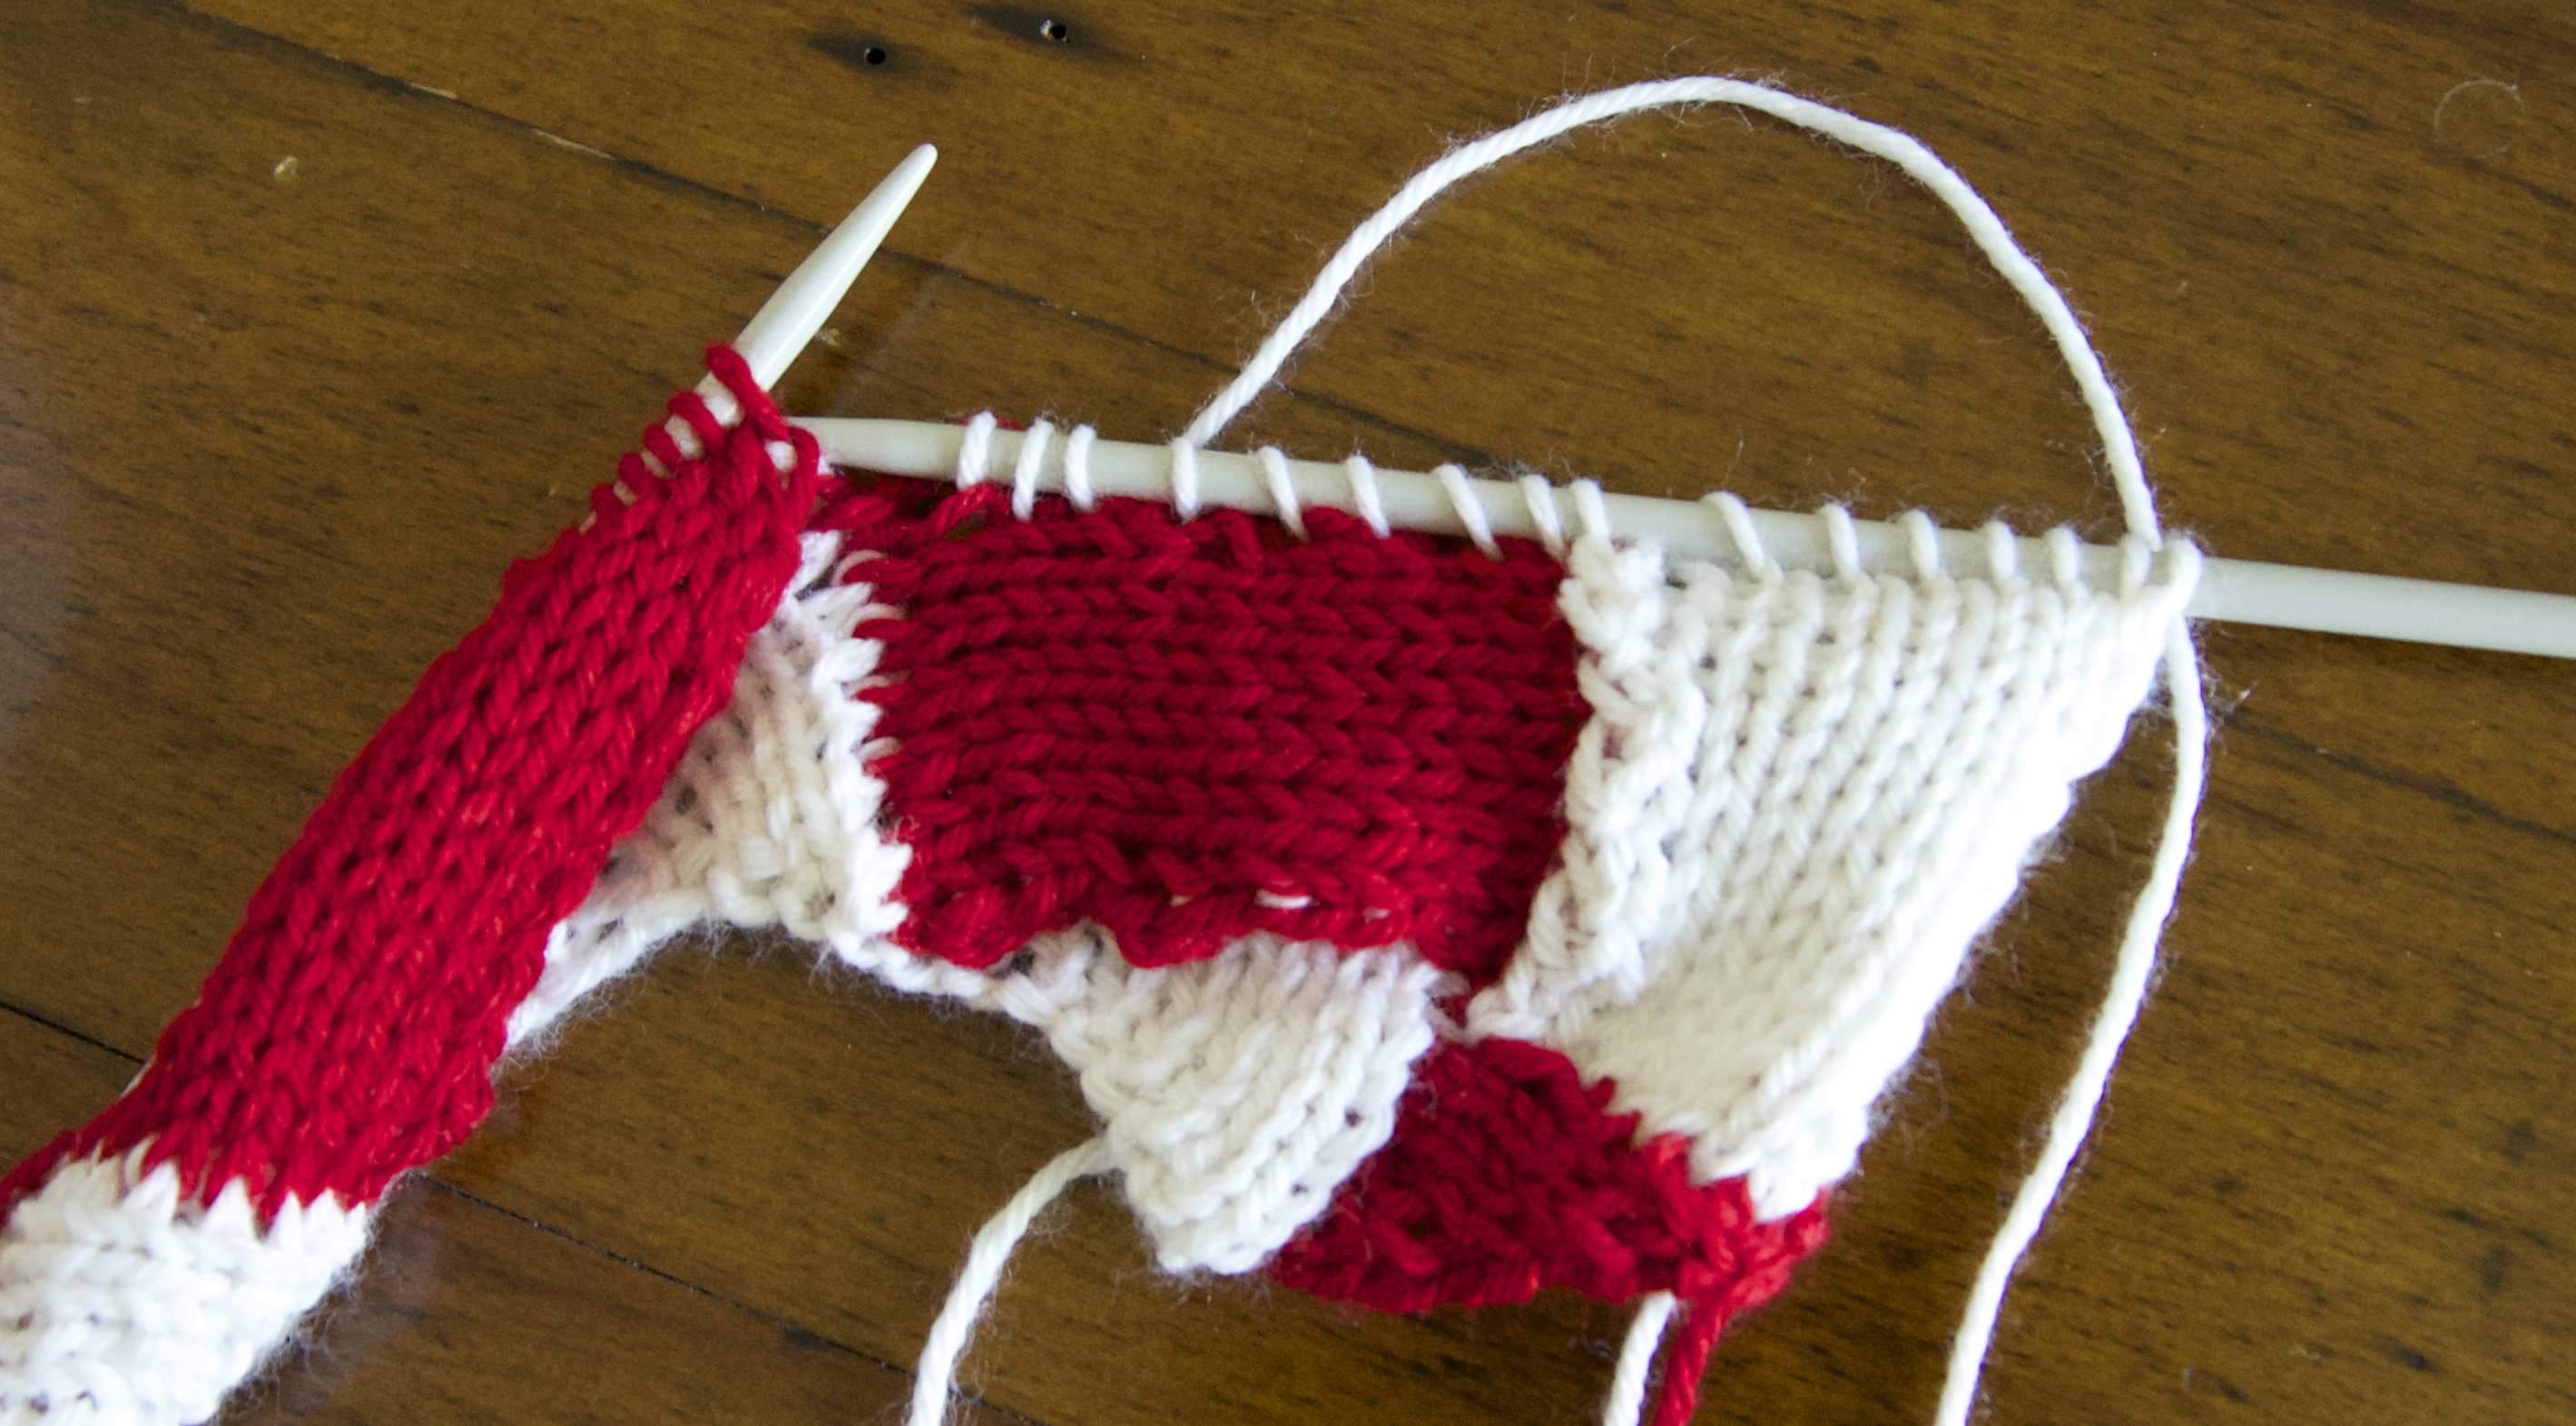
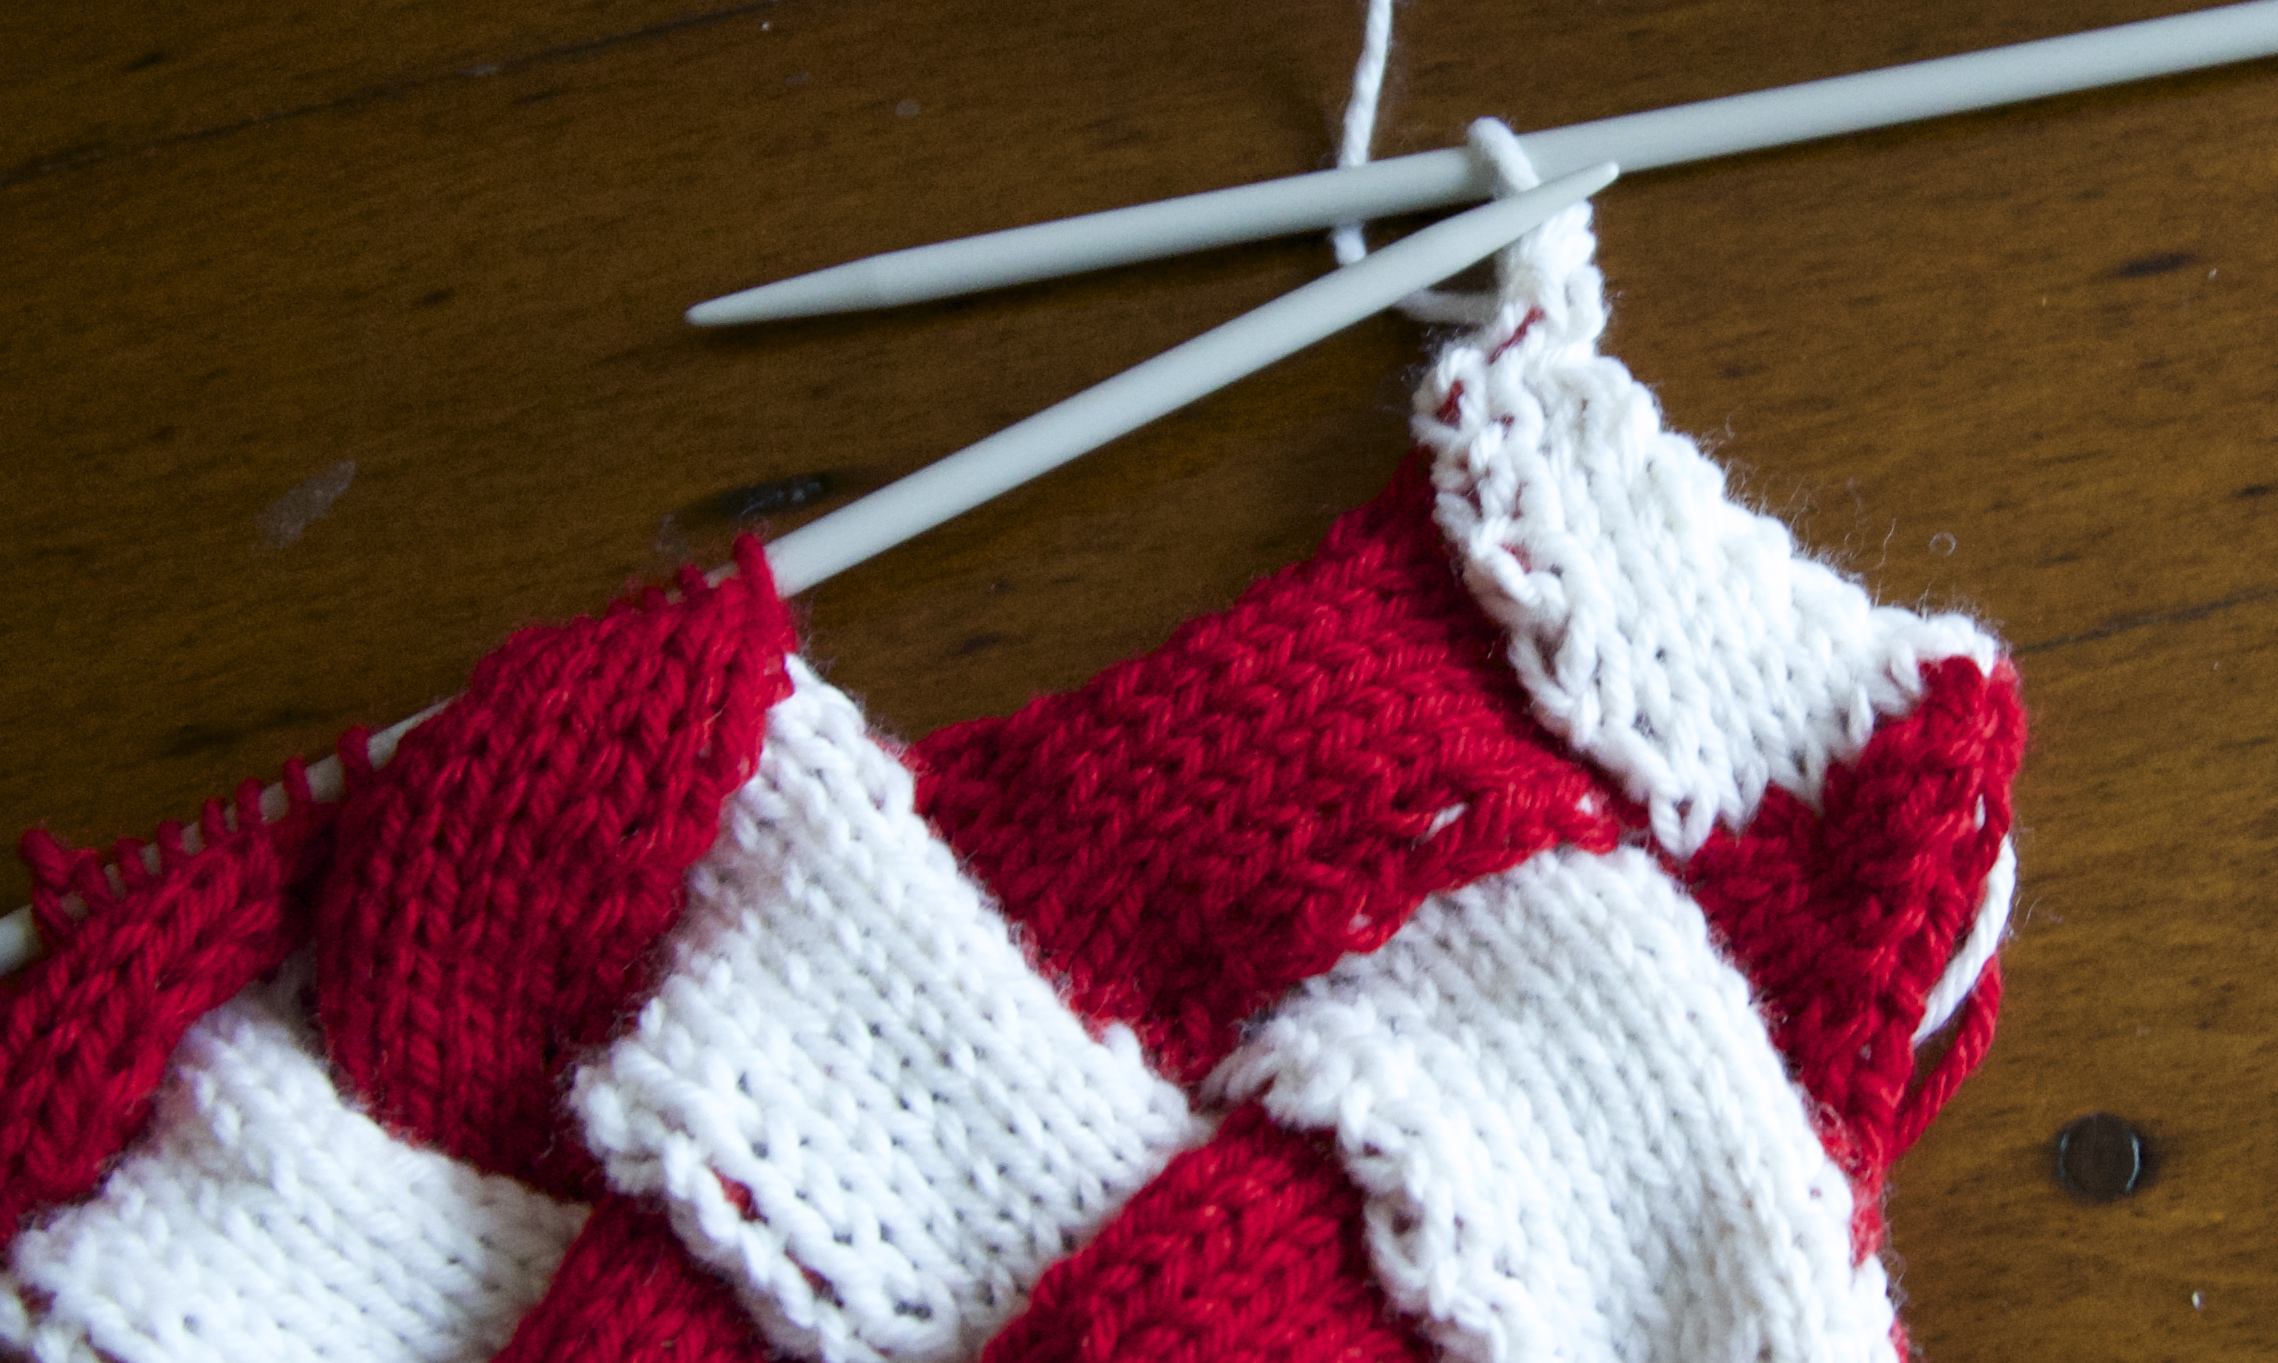
A completed tier 2. To recap: Your base triangles are white. Tier 1 is made up of 3 red parallelograms, and 2 red triangles on each end. Tier two is composed of 4 white parallelograms.
Continue repeating tiers one and two, until you reach the desired length. Ending after a tier one (the one with the side triangles). To end the work, you will be creating a set of triangles again. At this point, you should have 33 stitches on your needles; 32 on the left needle (8 for each parallelogram) and 1 on your right needle, leftover from the last triangle. Pick up 6 stitches along the gap and then ssk the first two stitches on the left needle. You should now have 1 red and 7 white stitches on your right needle, and 30 red stitches on your left needle. Turn.
On the right needle: 1 red stitch (the final triangle in the previous tier), 6 picked up white stitches and 1 white ssk (taken from two red) Note that on the left hand needle only 6 of the 8 parallelogram stitches are left.
- p8, turn
- k2tog, k5, ssk, turn
- p7, turn
- k2tog, k4, ssk, turn
- p6, turn
- k2tog, k3, ssk, turn *now you should see what this is accomplishing: the k2togs are forming the top edge of your project, while the ssks are bringing together the final triangles (white) and the last tier (red)
- p5, turn
- k2tog, k2, ssk, turn
- p4, turn
- k2tog, k1, ssk, turn
- p3, turn
- k2tog, ssk, turn
- p2, turn
- k2tog, do not turn
A completed final triangle. The k2togs have given you a flat top to your work
That marks the end of the triangle. You should now have 1 white stitch on your right needle, and 24 red stitches on your left needle. Repeat steps 1-14 until you have completed the work, and have only one stitch left on your work. Weave in ends. Block. Admire!


